Showing posts with label Desserts. Show all posts

Tuesday, May 27, 2014

HOW TO Do a Buttercream Frosting Transfer


Have you ever seen a cake with a picture painted in frosting?  Not those that are printed on edible paper, but actually just made of frosting?  They are created using a Buttercream Frosting Transfer.  That is a complicated name for something that is actually quite simple.  Once you've learned to do it, you can put any picture on a cake.  All it takes is a picture, some frosting, and some time!  Oh, and a piping bag and tip. 

Here's how to do it. 

First, get your picture.  I often use coloring book pictures that I download online, or pull pictures from websites.  If you're selling these cakes you may have copyright issues, but for your own home use it's fine. In this case, my son wanted a picture that he drew to be on his cake, so he drew the picture and colored it in and gave it to me.  Once you have the picture, you need to reverse it, so scan it and flip it horizontally, then print it out again.  Here is my son's original picture (colored) next to the flipped black and white version:


Once you have a flipped version, cut out any excess paper (don't cut too close, leave a border), and tape it onto the back of something metal, like a baking sheet.  Then tape a piece of waxed paper on top of the picture.  You'll be tracing the picture onto the waxed paper.


Next, mix up your frosting into whatever colors you desire.  I always use this frosting recipe,
because it's perfect in texture for this.  Look at your picture to see how much of each color you'll need.  You will also need to know what color the main frosting color will be on the cake (the background color, if you will), and mix that up too.  Here are all my colors:
You may notice that I have a pre-made tube of black decorating icing.  This is because black is a very difficult color to make, and it's easier to just buy it.  Red is also difficult, so if you have a lot of red (I did a Lightning McQueen cake once and it had a lot of red!) I recommend buying the tube.  I always buy Wilton brand, and get the kind that will attach to my decorating tips.

Okay, now that your frosting is ready, the first step is to outline everything in black.  Fit your tip (#2 or #3, I used #3 here) onto the black frosting and begin to carefully outline.  This is the most important step.  If you mess up, simply scrape the frosting off with a toothpick and try again.
Here it is with the outline done:

Next you do all of one color, whichever you like.  Use the same size tip as before.  If you don't want to buy an icing bag, you can cut the tip off a Ziploc bag and use that, it works almost as well.


When you are loaded up with frosting, fill in the areas that are that color.  You don't have to worry about covering up the black lines, because you are looking at the back of the picture.  Whatever you did in black will be in front, and will look great when you are done, so don't worry.  Just don't go outside of the outlines. 

Finally, when you're done filling in all the colors in the picture, fill in the background using the background color, which should be the same color that the main cake will be.  Here is mine with all the colors and the background done:
It looks weird, but again, that's because you're looking at the back side of it.  When you look at the front it will be great!

Now take it and put it in the freezer, still attached to the metal sheet.  Leave it there for several hours at least, or even better overnight.

Once it's solid, frost the cake, the same color as the background color you picked earlier.
Then remove the frosting transfer from the freezer.  Carefully remove the tape and take the frosting transfer (still on the waxed paper) off the sheet.  Turn it over onto the cake in the location you want it, and carefully remove the waxed paper.


Finally, smooth the edges of the frosting transfer so they blend into the rest of the cake.  Then decorate the remaining cake as desired.

Ta-Da!  You're finished!

Here are some other cakes I've used frosting transfers with. They're a great way to personalize a cake!


How to Make A Great Birthday Cake


I always make my children's birthday cakes, and every time I have a grown-up taste them they always comment on how good they are.  They taste so much better than straight from a box or purchased from a store.  And they're really easy to make!  I do start with a cake mix, but then add other ingredients to make it taste homemade, and to make the texture and moisture perfect.

You can do it too, to make a birthday cake of any shape or flavor!  Here's how to do it:

Best Birthday Cake

Ingredients:
1 standard boxed cake mix, any flavor, any brand
1/2 package of instant pudding, any flavor (though coordinate with your cake flavor)
1 cup flour
1 cup sugar
1 teaspoon vanilla
1 teaspoon baking powder
1 egg
1/2 cup water
+EVERYTHING LISTED ON THE BOX

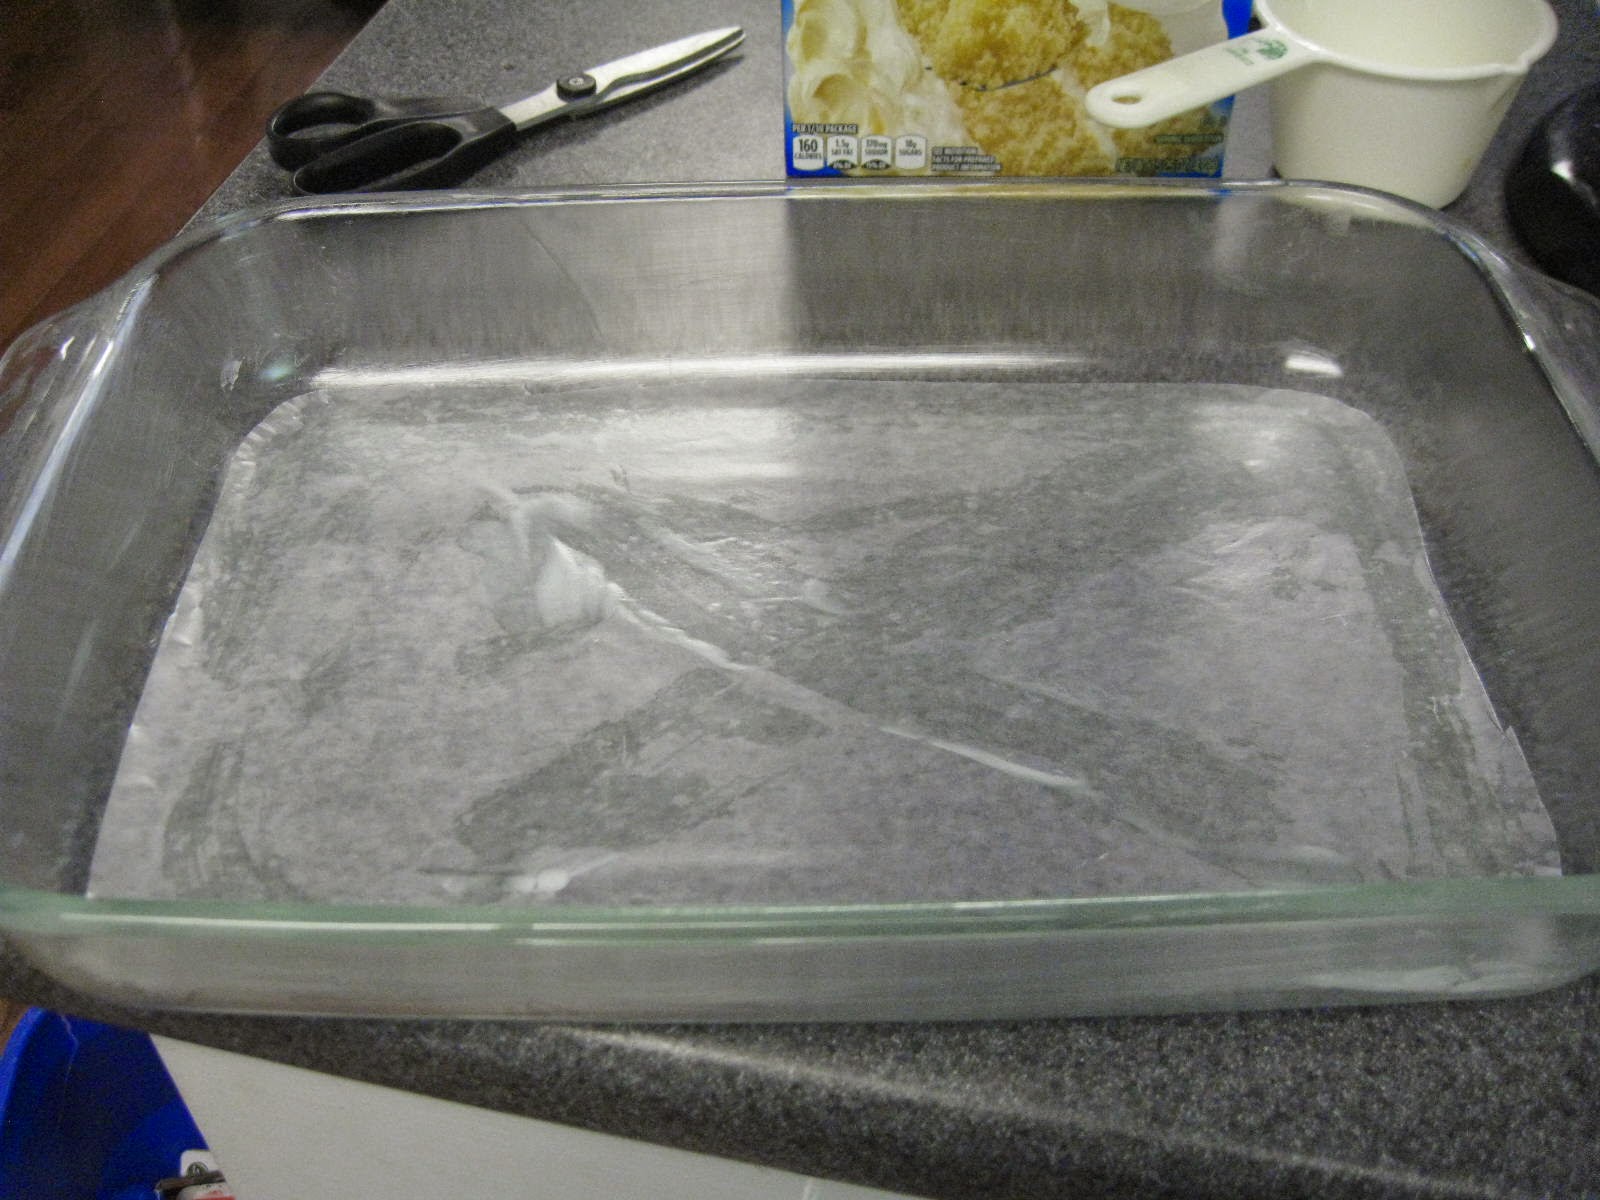
Preheat oven to temperature listed on box.  Prepare a baking dish (or several if you're making a layer cake) in the following manner:  Grease the sides well with vegetable shortening.


Place the pan(s) on top of a piece of waxed paper and trace around the bottom with a pencil, then cut out the shape you traced.  Make a large "X" on the inside bottom of the baking pan(s) and then put the waxed paper on top.  Set aside.

In a large mixing bowl, combine the cake mix, half a package of pudding, flour, sugar, vanilla, baking powder, egg, water, and all the ingredients that the recipe on the cake mix calls for (usually more eggs, water, and oil).  Mix on low speed for 30 seconds, then on high for 2 minutes or until well mixed.  Pour batter carefully into prepared pan(s).  Place in preheated oven to bake.

Baking will probably take 15 minutes more than the suggested time on the box, unless you're making lots of layers.  When a knife inserted into the center of the cake comes out with a few crumbs clinging, it's done baking.

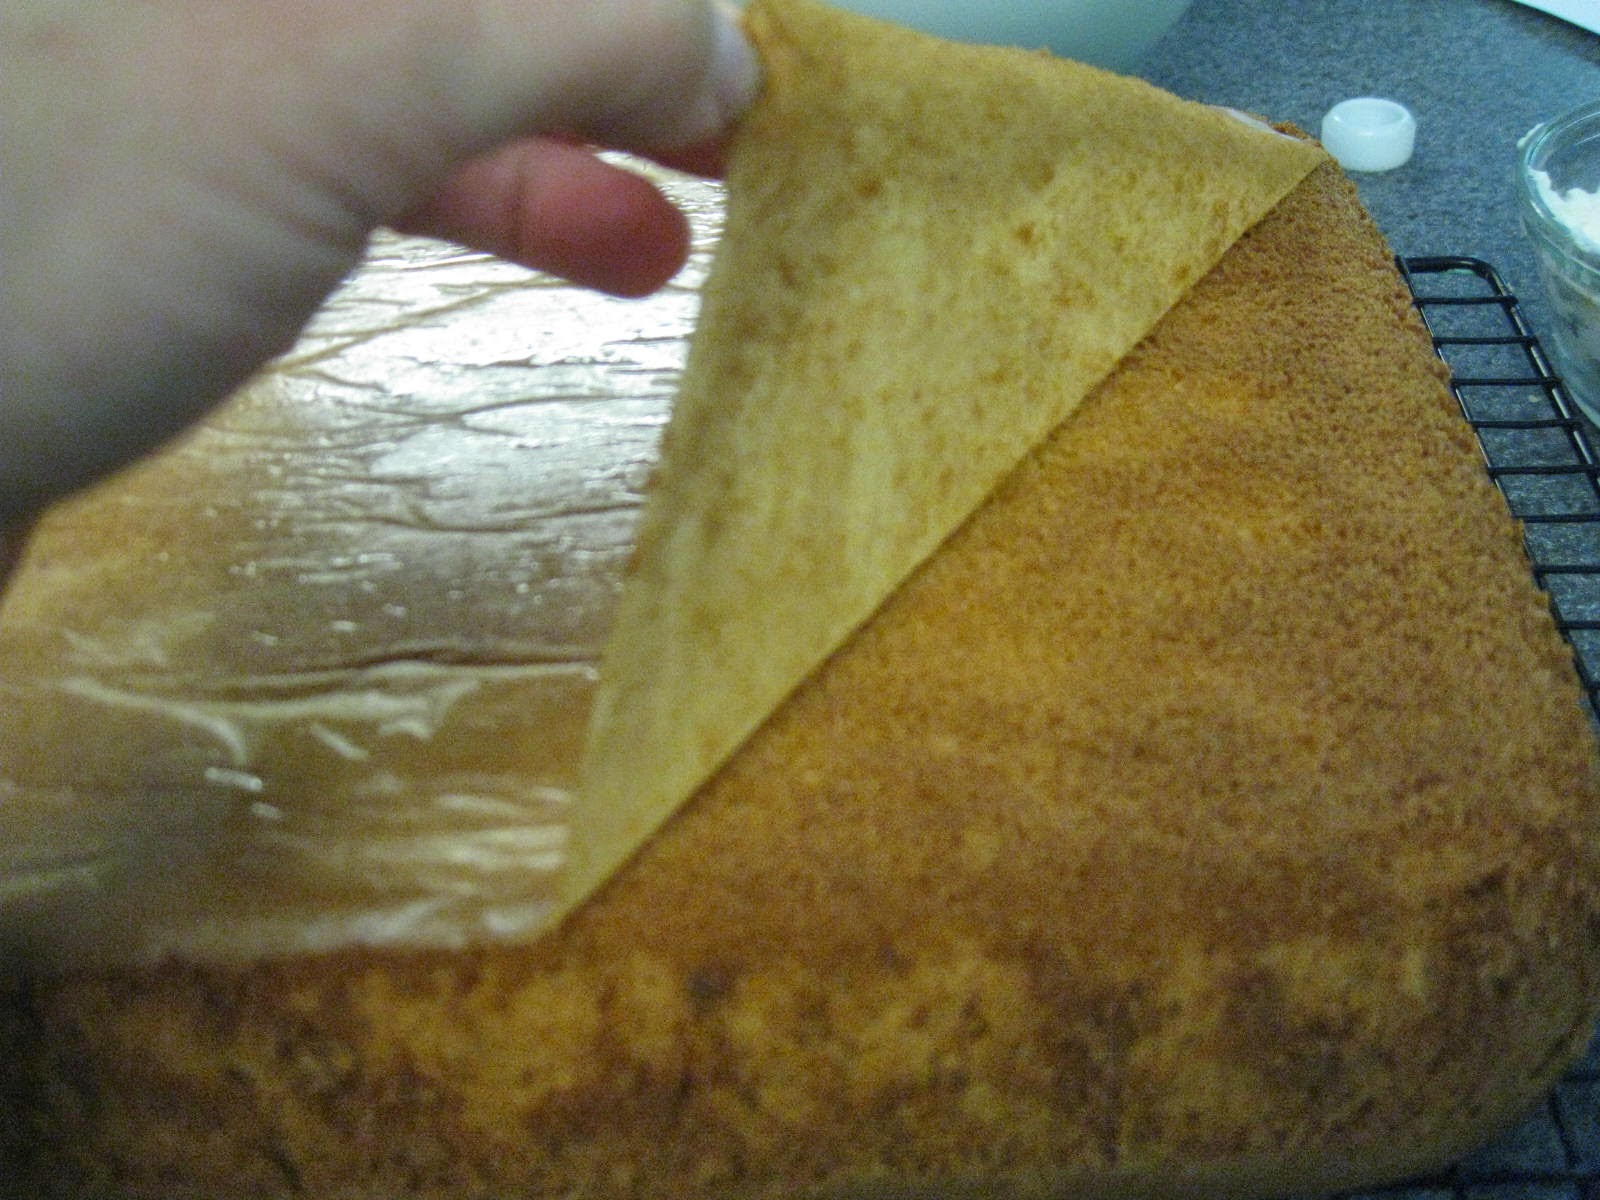
Remove from oven and let cool 10-15 minutes.  Run a butter knife around the edges of the pan, then invert onto a cooling rack.  It should come out easily, without any breakage, because of the waxed paper on the bottom.  You can peel the waxed paper off now or later, whichever you prefer.

Cool cake completely, or wrap tightly in layers of plastic wrap and freeze, before frosting and decorating.

And if you want your cake to taste REALLY good, use this frosting recipe!

Buttercream Icing
Recipe by Wilton

Ingredients:
1 stick (1/2 cup) butter, room temperature
1 cup vegetable shortening, NOT butter flavored
1/4 teaspoon salt
1/2 teaspoon vanilla (if you want pure white frosting, use clear vanilla)
1/2 teaspoon butter flavoring
1/2 teaspoon almond flavoring (can be omitted if you have nut allergies)
1 lb powdered sugar
1 tablespoon meringue powder (this can be purchased in the baking aisle of most grocery stores, or at craft stores like Michaels)
Water as needed


In the mixer, mix butter, shortening, and salt until well combined, about 2 minutes.  Add butter, vanilla, and almond flavors and mix well.  Add powdered sugar and meringue powder and mix on low until incorporated, about 5 minutes.  Test the consistency and add water, just a teaspoon at a time, until it's the way you want it.  I usually add about 2 tablespoons.  If you add too much water you can add in some more powdered sugar to thicken it up.


You can keep this icing in an airtight container at room temperature for up to 2 weeks.  It makes enough to frost one cake made with the recipe above.


Friday, August 9, 2013

Quick and Easy Fresh Peach Pie with Whipped Coconut Cream


Several years ago my sister-in-law made this pie for a family gathering.  I've since seen it lots of other places, and it is one of my favorites because it's so quick and easy, and delicious, and showcases the amazing peaches that are in season right now!  So when we went peach picking last week I knew I had to make it!

I decided to spice it up a bit by serving it with whipped coconut cream instead of regular whipped cream.  I think it took it from a great pie to an amazing pie.  It was just the right amount of coconut to transport you to another place.  Yum!

I've included directions on how to make the graham cracker crust, but if you prefer to buy a ready-made one, just skip the first three ingredients and the first part of the instructions.

Quick and Easy Fresh Peach Pie with Whipped Coconut Cream
Recipe adapted from Melinda Davis

Ingredients:
1 sleeve graham crackers (10 full crackers)
2 T sugar
1/2 cup butter (1 stick), melted
6-8 large ripe peaches
1 14-oz can sweetened condensed milk
1 lemon, juiced
1 can coconut milk (full fat, or it won't whip!)
2 Tbs powdered sugar
1 tsp vanilla

For the crust, place all the crackers in a food processor and process until they turn into crumbs.  Pour into a medium bowl and mix with 2 T sugar.  Add melted butter and stir.  Press into bottom and sides of a pie pan, using the back of a soup spoon to smooth to an even thickness.  Place in refrigerator until ready to use.

Skin, pit and slice all the peaches into a medium bowl.  Pour sweetened condensed milk and lemon juice over the peaches and stir gently until well-combined.  Pour peaches and milk sauce into pie crust.  Cover with plastic wrap and refrigerate for 2 hours (or more). 

Place can of coconut milk into freezer at least 30 minutes before serving pie.  Just before serving, remove can from freezer.  TURN CAN UPSIDE DOWN and open from bottom.  This is because the fat, which is what you want to whip, rises to the top.  You need to get rid of the coconut water that is at the bottom, so open the can upside down and pour out the coconut milk.  You can keep it for another use or discard it, as you desire.

Once the coconut water is removed, scoop out the coconut cream into a medium bowl.  Add powdered sugar and vanilla and beat until light and fluffy, about 5 minutes on high.  Unlike regular whipped cream, coconut cream stores well in the refrigerator and won't separate.

Serve a slice of cold pie with the coconut cream on top.  Enjoy!

Makes 1 pie, about 6-8 slices.


Tuesday, June 18, 2013

Big and Soft Sugar Cookies


There are so many different styles of sugar cookie.  Some are thin and crisp, some are fat and frosted, some are chewy and some are cakey.  These cookies are most like the type that you buy from the grocery store, that they always have frosted in the colors of whatever holiday is coming next, or if there isn't a holiday around the corner, they're usually pink with sprinkles on top.  They are big and soft and cakey and delicious. The frosting is to die for, especially when it's slathered on thick.  So for the next birthday, holiday, or random day, make these cookies.

Big and Soft Sugar Cookies
Recipe adapted from here

Cookies:
1 cup butter, at room temperature
2 cups sugar
3 eggs
1 1/2 tsp vanilla
1/2 tsp almond extract
1 1/2 cups sour cream
6 cups flour
1 tsp baking soda
1 tsp baking powder
1/4 tsp salt

Frosting:
1 1/2 cups butter
1 tsp vanilla
6 cups powdered sugar
2-3 T milk
food coloring, if desired

For the cookies:
Cream the butter and sugar together at medium speed until light and fluffy, about 3 minutes.  Scrape down the sides of the bowl, then beat in the eggs, one at a time, mixing well between each egg.  Add vanilla, almond extract and sour cream and beat until combined.

Add the dry ingredients and mix on low until combined.  Dough will be very sticky.  Cover with plastic wrap and refrigerate for at least 2 hours or overnight.

Preheat oven to 425F.  Remove a quarter of the dough and place on a lightly floured surface.  Place remaining dough back in the refrigerator until ready to use.  Lightly flour the top of the dough before rolling dough to 1/4-inch thick.  Using a 2 1/2 or 3-inch biscuit cutter cut out circles and transfer to a lightly greased baking sheet.  Bake for 7 minutes, then immediately transfer to a cooling rack.  Cookies should not be browned.

Continue to roll, cut, and bake cookies until all dough is used.  While cookies are cooling, make the frosting.

For the frosting:
In a large mixing bowl combine butter, vanilla, and powdered sugar.  Add milk, one tablespoon at a time, until it reaches a spreading consistency.  Add food coloring if desired and beat until well combined.

Once cookies are completely cooled, frost generously and add sprinkles or other toppings if desired.  Store at room temperature in an air-tight container.

Makes about 4-5 dozen cookies.

Sunday, June 9, 2013

Glazed Doughnuts

In honor of National Doughnut Day, I thought I'd repost my favorite doughnut recipe!  Here it is!


Glazed Doughnuts

Ingredients:
1 cup milk
2 packets (2 T) yeast
3 cups flour
1/2 cup warm mashed potato (microwave a medium potato on high for 5 minutes, scoop out potato and mash with a fork)
1/2 tsp salt
1/4 cup sugar
2 T oil
Vegetable or Canola oil to fry in
2 cups powdered sugar
1/2 cup milk
1 tsp vanilla

Microwave 1 cup milk for 1 minute or until warm but not hot. Stir in yeast and let sit 5 minutes. Meanwhile, in a medium bowl combine flour, mashed potato, salt, and sugar. Mix well then add the milk/yeast mixture and oil. Mix until a soft dough forms. Turn onto a floured surface and knead until dough is smooth and not too sticky. Roll into a circle that is 1/2" thick. Using a doughnut cutter or two biscuit cutters, cut into doughnuts. You can either keep the doughnut holes and fry them too (we do) or re-roll them into the dough to cut out more doughnuts. Repeat until dough is used up. Place cut doughnuts on a lightly floured surface to let rise for 15 minutes.

Meanwhile, make the glaze. Put powdered sugar in a small bowl. Add milk, one tablespoon at a time, until glaze is desired consistency. Add vanilla and mix well.

In an electric skillet or frying pan, pour enough oil so that it is 1/2" deep in your pan. Heat until 350F (medium to medium high on a stove). It should take about 5 minutes to heat up. Place doughnuts carefully in oil, cooking each side until browned. Remove to wire rack that has paper towels underneath to catch the oil. After doughnuts have cooled for about 3 minutes, drizzle with glaze.

Makes 12-15 doughnuts and holes.

Monday, February 11, 2013

Valentine's Day Heart-Shaped Cinnamon Rolls


I saw this idea floating around Pinterest and thought I'd try it.  They turned out nicely.  The buns do lose their shape a bit when baking, but a little frosting in the right shape helps you see the heart.  This is my favorite cinnamon roll dough! As a note on the recipe, you need a total of 9 Tbs of butter, 4 of which is melted.  I split it up in the recipe.

Heart-Shaped Cinnamon Rolls
Recipe adapted from Peter Reinhart

Ingredients:
6 1/2 Tbs sugar
1/2 tsp salt
5 Tbs butter
1 large egg, slightly beaten
1 tsp lemon extract (not lemon juice!) or lemon zest
3 1/2 cups flour
2 tsp yeast
1 1/4 cup buttermilk
2 Tbs butter, melted
1/2 cup cinnamon sugar (7 Tbs sugar plus 2 Tbs cinnamon)
1 cup powdered sugar
2 Tbs milk
2 Tbs butter, melted
1/4 tsp lemon extract or vanilla extract

In a mixer, cream together sugar, salt, and 5 tbs butter on medium-high with the paddle attachment.  Whip in egg and lemon until smooth, then add flour, yeast, and buttermilk.  Mix on low speed until dough forms a ball.  Switch to the dough hook and increase speed to medium.  Machine knead for approximately 10 minutes or knead by hand for about 15 minutes, until dough is silky and supple, tacky but not sticky.  You may need to add a little extra flour to achieve the right texture, but don't add more than 1/2 cup.

Place kneaded dough in a lightly oiled bowl.  Spray the top with oil and cover with plastic wrap.  Let rise for about 2 hours, or until the dough doubles in size. If you put the dough in a warm (90-120F) oven, it will rise faster.

Punch the dough down. Spray the countertop with cooking spray and transfer the dough to the counter.  Roll out the dough with a rolling pin until you have a rectangle about 2/3" thick and 14" wide by 12" long.  Don't roll too thin or the rolls will be tough instead of tender.

Spread or brush the 2 Tbs melted butter over the surface of the dough.  Sprinkle the cinnamon sugar over the dough all the way to the edges.  Roll up the dough, beginning with the bottom long side, up to the center.  Roll the top of the dough down to meet the other roll.  It will look like a scroll.  Using a sharp knife, bench scraper, or some dental floss, cut the scroll into 12 equal pieces, each about 1 1/2 inches thick.  Place each roll, cut-side down, 1/2" apart on a lightly greased baking sheet.  Pinch the bottoms out so they look like hearts.  Mist the dough with cooking spray and cover loosely with plastic wrap. 


Let rise for 1 - 1 1/2 hours, or until large and puffy and almost touching. 

Preheat oven to 350F.  Bake for 20-30 minutes, or until the tops are golden brown.  Let cool slightly while you prepare the icing.

In a small pan combine powdered sugar, 2 Tbs melted butter, lemon or vanilla, and 1 Tbs milk. If the glaze is too thick, add more milk, a teaspoon at a time, until a thick but pourable glaze is created.  Put the icing into a pastry bag or a ziplock-type bag with the corner cut off.  Pipe the icing onto the buns in a heart shape, following the swirls in the dough as a guide.

Makes 12 heart-shaped buns.

Sunday, December 16, 2012

English Toffee


When Christmas comes everyone likes to make treats to give to friends and co-workers, or to hoard at home (ha!).  English toffee is one of my favorite Christmas treats to make.  It only has a few ingredients, it's easy to make, and tastes amazing.  It cuts up nicely and can be packaged easily, making it perfect for giving away. It is wonderful to munch on by itself, and any little bits add a perfect tasty crunch on top of ice cream or apple pie.  In other words, it's pretty much the perfect Christmas treat!

Be sure you have everything ready to go BEFORE you start cooking, because once you start you have to stir continuously until it's done, so you don't have time to run to the refrigerator to grab more butter, or to pull out the pan.  Also, I highly recommend using a candy thermometer that clips onto the side of your pan, like the ones made by Taylor company.

English Toffee

Ingredients:
2 cups sugar
1 cup water
1 lb (2 cups, or 4 sticks) butter
1-2 cups whole almonds (optional)
12 oz semi-sweet or dark chocolate, chopped
1/2 cup almonds, finely chopped

Have an ungreased jelly-roll pan sitting near by, ready to receive your toffee when cooked.  Also, unwrap your butter sticks and have both the butter and whole almonds sitting within reach of your stove.

In a large heavy pan combine sugar and water.  Bring to a boil over high heat with the lid on.  Uncover and cook WITHOUT STIRRING until the sugar-water mixture reaches 230-degrees F.  Add one stick of butter and stir constantly until the butter is completely melted.  Continue stirring as you add in each remaining stick, waiting until the previous stick is completely melted before adding the next.  When all the butter is melted add the whole almonds, continuing to stir vigorously.  If you don't stir fast enough the bottom will burn and ruin the entire batch.  Stir constantly until the mixture reaches 285-degrees F, or soft crack stage.  This should take an additional 5-10 minutes. The mixture will be a golden color (about the color of peanut butter), and you may hear an almond crack.  Continue stirring as you remove the toffee from the heat and immediately pour into the waiting jelly-roll pan, scraping the edges to get all the bits.  Spread the toffee evenly in the jelly-roll pan and let cool completely.  You can place the pan in the freezer or refrigerator to speed this process up.

When the toffee is completely cool, place the chopped up chocolate in a small bowl and melt in the microwave at high power for 1-2 minutes, stirring every 30 seconds.  Spread the melted chocolate evenly over the surface of the toffee, then immediately sprinkle the finely chopped almonds on top.  Let cool until the chocolate is hard.  Again, this can be speeded up by placing the tray in the refrigerator or freezer.

When everything is cool and hard, cut the toffee into squares (I usually cut them into roughly 2-inch squares).  I use a metal bench scraper and a mallet to do this, but you can also use a large butcher-style knife.  If you don't care what size the toffee pieces are, you can drop the entire pan onto a countertop a few times until the toffee cracks.

Store in an airtight container.  Toffee will store practically forever, but don't worry, it won't last very long, so it won't be necessary to store it forever.

Makes about 50 2-inch toffee squares.

Wednesday, September 5, 2012

Cinnamon Buns


I have a million different recipes for cinnamon buns, because everyone makes the dough a little different, and everyone does the filling a little different. This one is by Peter Reinhart, who is widely considered the authority on bread-making in the United States.

I love the dough in this recipe because it's so light and fluffy, and because it has an amazing flavor to it. The filling is just plain cinnamon-sugar, which is nice, but I prefer add a little butter to my filling.  So feel free to make that change if you'd like--I know I will be.

As a note, the glaze, while good, can quickly mask the nuanced flavor of the roll itself, so go easy on it. That picture, by the way, has waaaay too much icing.  Drizzle, not pour, is the key to getting the right amount to heighten the sweetness without killing the flavor.

Cinnamon Buns
Recipe by Peter Reinhart

Ingredients:
6 1/2 Tbs sugar
1 tsp salt
5 Tbs unsalted butter (you can use salted, just cut the salt measurement in half) or shortening
1 large egg, slightly beaten
1 tsp lemon extract (NOT lemon juice) or lemon zest
3 1/2 cups unbleached flour
2 tsp yeast
1 1/4 cup buttermilk
1/2 cup cinnamon sugar (7 Tbs sugar plus 2 Tbs cinnamon)
1 cup powdered sugar
2 Tbs milk
1/4 tsp lemon extract or vanilla extract

In a mixer, cream together sugar, salt, and butter or shortening on medium-high with the paddle attachment.  Whip in egg and lemon until smooth, then add flour, yeast, and buttermilk.  Mix on low speed until dough forms a ball.  Switch to the dough hook and increase speed to medium.  Machine knead for approximately 10 minutes or knead by hand for about 15 minutes, until dough is silky and supple, tacky but not sticky.  You may need to add a little extra flour to achieve the right texture, but don't add more than 1/2 cup.

Place kneaded dough in a lightly oiled bowl.  Spray the top with oil and cover with plastic wrap.  Let rise for about 2 hours, or until the dough doubles in size.

Punch the dough down. Spray the countertop with cooking spray and transfer the dough to the counter.  Roll out the dough with a rolling pin until you have a rectangle about 2/3" thick and 14" wide by 12" long.  Don't roll too thin or the rolls will be tough instead of tender.

Sprinkle the cinnamon sugar over the dough all the way to the edges.  Roll up the dough, beginning with the long side, into a long roll.  Using a sharp knife, bench scraper, or some dental floss, cut the long into 8 equal pieces, each about 1 3/4 inches thick.  Place each roll, cut-side down, 1/2" apart on a lightly greased baking sheet.  Mist the dough with cooking spray and cover loosely with plastic wrap.

Let rise for 1 - 1 1/2 hours, or until large and puffy and touching.

Preheat oven to 350F.  Bake for 20-30 minutes, or until the tops are golden brown.  Let cool for 10 minutes while you prepare the icing.

In a small pan combine powdered sugar, lemon or vanilla, and 1 Tbs milk. If the glaze is too thick, add more milk, a teaspoon at a time, until a thick but pourable glaze is created.  While the buns are still warm, drizzle the icing on top.

Makes 8 large buns.

Friday, August 3, 2012

Lemon Meltaways

These cookies are quick to make and quickly disappear!  The original recipe calls for lime, but I had lemons so that's what I used. I love that you can make these ahead of time and throw them in the fridge or freezer until you're ready to bake.  A busy mom's dream!

Lemon Meltaways
Recipe adapted from Martha Stewart

Ingredients:
3/4 cup unsalted butter, at room temperature
1 cup powdered sugar, divided
Zest of 2 lemons
2 T fresh lemon juice
1 T vanilla
2 cups flour
2 T cornstarch
1/4 tsp salt

Put butter and 1/3 cup powdered sugar in a large mixing bowl and beat on medium speed until pale and fluffy, about 2 minutes.  Add lemon zest and juice and vanilla and mix until fluffy, about 1 minutes.  In a separate bowl combine flour, cornstarch, and salt.  Add to butter mixture and mix on low speed just until combined.

Divide dough in half.  Place each half on an 8x12-inch piece of parchment or wax paper.  Roll dough to form a log 1 1/4-inches in diameter.  Wrap up in parchment or wax paper and refrigerate  until cold and firm, at least one hour.

Preheat oven to 350F.  Remove cookie dough from fridge and slice into 1/4-inch-thick rounds.  Place rounds 1 inch apart on baking sheets.  Bake cookies until barely golden, about 13 minutes.  Transfer cookies to wire racks to cool slightly, just for about 8 minutes.  Meanwhile, place remaining 2/3 cup powdered sugar in a resealable plastic bag.  Toss warm cookies gently in bag with powdered sugar until coated.

Makes about 4 dozen cookies.

Tuesday, July 17, 2012

Fruit Crisp--A Basic Recipe

Peach-Blueberry Crisp


Fruit crisps (or crumbles if you're British) are very simple, and so delicious.  They're a great way to showcase an abundance of in-season fruit.  You can combine different varieties or pick just one.  You can add different spices to change the flavor, and whatever you do it will always be delicious.  Well, unless you add something crazy like cumin.  Then it probably won't be.  But you never know! 

Here's the basic recipe:

Fruit Crisp -- A Basic Recipe

Ingredients:
4 cups fruit, sliced and pitted.  Skinned if it's not a skin you would normally eat.  You can also mix fruits, such as berries and peaches, or pears and apples, or cherries and apricots; just be sure you have 4 cups of fruit total. 
1/4 - 3/4 cup sugar, depending on the tartness of your fruit.  If you're using something really tart, like rhubarb, you should use 3/4 cup.  If you're using something really sweet, like very ripe pears, use 1/4 cup.  For everything else, use 1/2 cup.
1 tsp lemon juice, regardless of the fruit you are using.  It brings out the flavor and preserves the color.
1 Tbs cornstarch, to thicken the mixture. 
1 Tbs butter, because it makes everything taste better.
Spices, a little bit (1/4-1/2 tsp) of something is usually nice.  Cinnamon goes with everything, but try to put other things in as well.  Ginger goes well with apples, pears, apricots, and peaches.  Chinese Five Spice goes with peaches and plums.  Cloves go with plums and oranges.  Nutmeg goes with cherries, apples, pears, or berries.  Cardamom is great with berries.  Try something out and see how it goes. 

Topping Ingredients:
6 T all-purpose flour
1/4 cup brown sugar
1/4 cup white sugar
1/2 tsp cinnamon
1/4 tsp salt
1/2 cup oats
6 T butter

Optional items: Chopped nuts, coconut, or other spices.

Preheat your oven to 400-degrees F. You can make either the topping or the filling first, it doesn't really matter.  If you make the topping first, keep it in the fridge until you're ready to use it.  If you make the filling first, keep it in the saucepan until the topping is made.

For the filling: If your fruit isn't very juicy, toss it with the sugar and lemon juice and let it sit until the juices are released (15-30 minutes).  If you're using something like peaches or pears, which are very juicy to begin with, you can skip the macerating (which is a fancy way of saying "Let it sit until the juices are released.").

Next throw the fruit and the rest of the topping ingredients EXCEPT the butter into a saucepan.  Heat it until it boils, then stir and keep it boiling for a minute or two, until it's a bit thicker.  Remove from heat and stir in the butter.

For the topping:  Mix everything but the butter together.  Grate the butter (using the big holes on a cheese grater) into the mixture, then use your hands to evenly distribute it. 

To assemble: Pour the filling into a square 8" or 9" pan, or into a similarly-sized casserole dish.  Alternatively, you can use 4-6 individual ramekins.  Top the filling with the topping.  Bake at 400F for 20 minutes, or until the filling is bubbling and the topping is crispy.  Let sit for 10 minutes before serving.  Serve with whipped cream or vanilla ice cream.

Saturday, July 14, 2012

Fresh Cherry-Almond Crumble


A few years back I developed a recipe for a cherry crisp that used coconut and almond in the topping.  It was delicious, but it used canned cherries, and since cherries are in season and I happened to have a whole bag of them sitting on my counter-top, I decided to alter the recipe to use the fresh cherries.  I wasn't sure how it would turn out but it was fantastic!  So here it is, for you to enjoy.  You could, of course, leave out the coconut and/or almonds if you prefer, but I think they add a bit of flavor and texture that really makes this dish unique.  We served it with homemade vanilla ice cream on top.

As a note, if you don't have a cherry pitter you can just slice the cherries in half and remove the pit.  It takes a little longer but will still get the job done.

Fresh Cherry-Almond Crumble

Cherry Filling Ingredients:
4 cups fresh cherries, pitted
1/2 cup sugar
1 tsp lemon juice
1/4 cup water
1 Tbs cornstarch
1 Tbs butter

Crumble Topping Ingredients:
6 T all-purpose flour
1/4 cup brown sugar
1/4 cup white sugar
2 T shredded coconut
1/2 tsp cinnamon
1/4 tsp nutmeg
1/4 tsp salt
1/2 cup oats
1/4 cup chopped almonds
6 T butter

In a medium saucepan, combine the cherries, sugar, and lemon juice.  Stir together and let sit for 15-30 minutes to release the juices. 

Meanwhile, preheat the oven to 400F and make the topping. 

In a small bowl combine all the topping ingredients except the butter.  Using the largest holes on a cheese grater, grate the butter over the topping mixture.  After all the butter has been grated, mix it lightly with your hands until the butter is evenly distributed.  Refrigerate the topping until needed.

Once the cherries have released some juices, add water and cornstarch to the saucepan with the cherries and heat over medium-high heat, stirring occasionally.  Bring the mixture to a boil, then stir constantly and continue to boil for at least one minute, or until the liquid thickens and the cherries are very soft.  Remove from heat and stir in the butter.

Pour cherry filling into an ungreased 8" or 9" square baking dish.  Spread topping evenly over cherry mixture.  Bake at 400-degrees F for 20 minutes.  Serve with whipped cream or vanilla ice cream.

Serves 6-8.

Friday, June 15, 2012

Ice Cream Sandwiches


My daughter, who is nearly 4 years old, is crazy for ice cream sandwiches.  So in honor of the last day of school I thought we'd make some.  I played around with the cookie bit until I found something that worked.  And the ice cream bit is easy.  They turned out great, way better than store-bought! So here's the tutorial.  Make a bunch, and enjoy them all summer long!

Ice Cream Sandwiches

Ingredients:
1 Devil's Food Cake mix
3/4 cup vegetable shortening
2 eggs
1/2 tsp vanilla extract
Vanilla ice cream (or whatever flavor you prefer)
Sprinkles (optional)

Preheat oven to 350F.  Mix the cake mix, shortening, eggs, and vanilla in a large bowl until well mixed.

Take a leveled tablespoon of the dough and put it on the cookie sheet.  Then mold it into a square that is slightly bigger than an inch all around, and about 1/4-1/2-inch thick.


Keep the squares at least an inch and a half apart, because they spread quite a bit.  I had twelve raw cookies on my baking sheet.

Place cookies in oven and bake at 350F for 9 minutes.  When cookies are baked, remove from oven and immediately use a knife or spatula to make them square again.  Unless you don't care, in which case, don't. :)

Let the cookies sit on the baking sheet for a minute or two, then remove to a cooling rack that is lined with paper towels.

Let cookies cool completely, about an hour.  When you're ready to put the cookies together, place an empty baking sheet in your freezer and get out the ice cream!

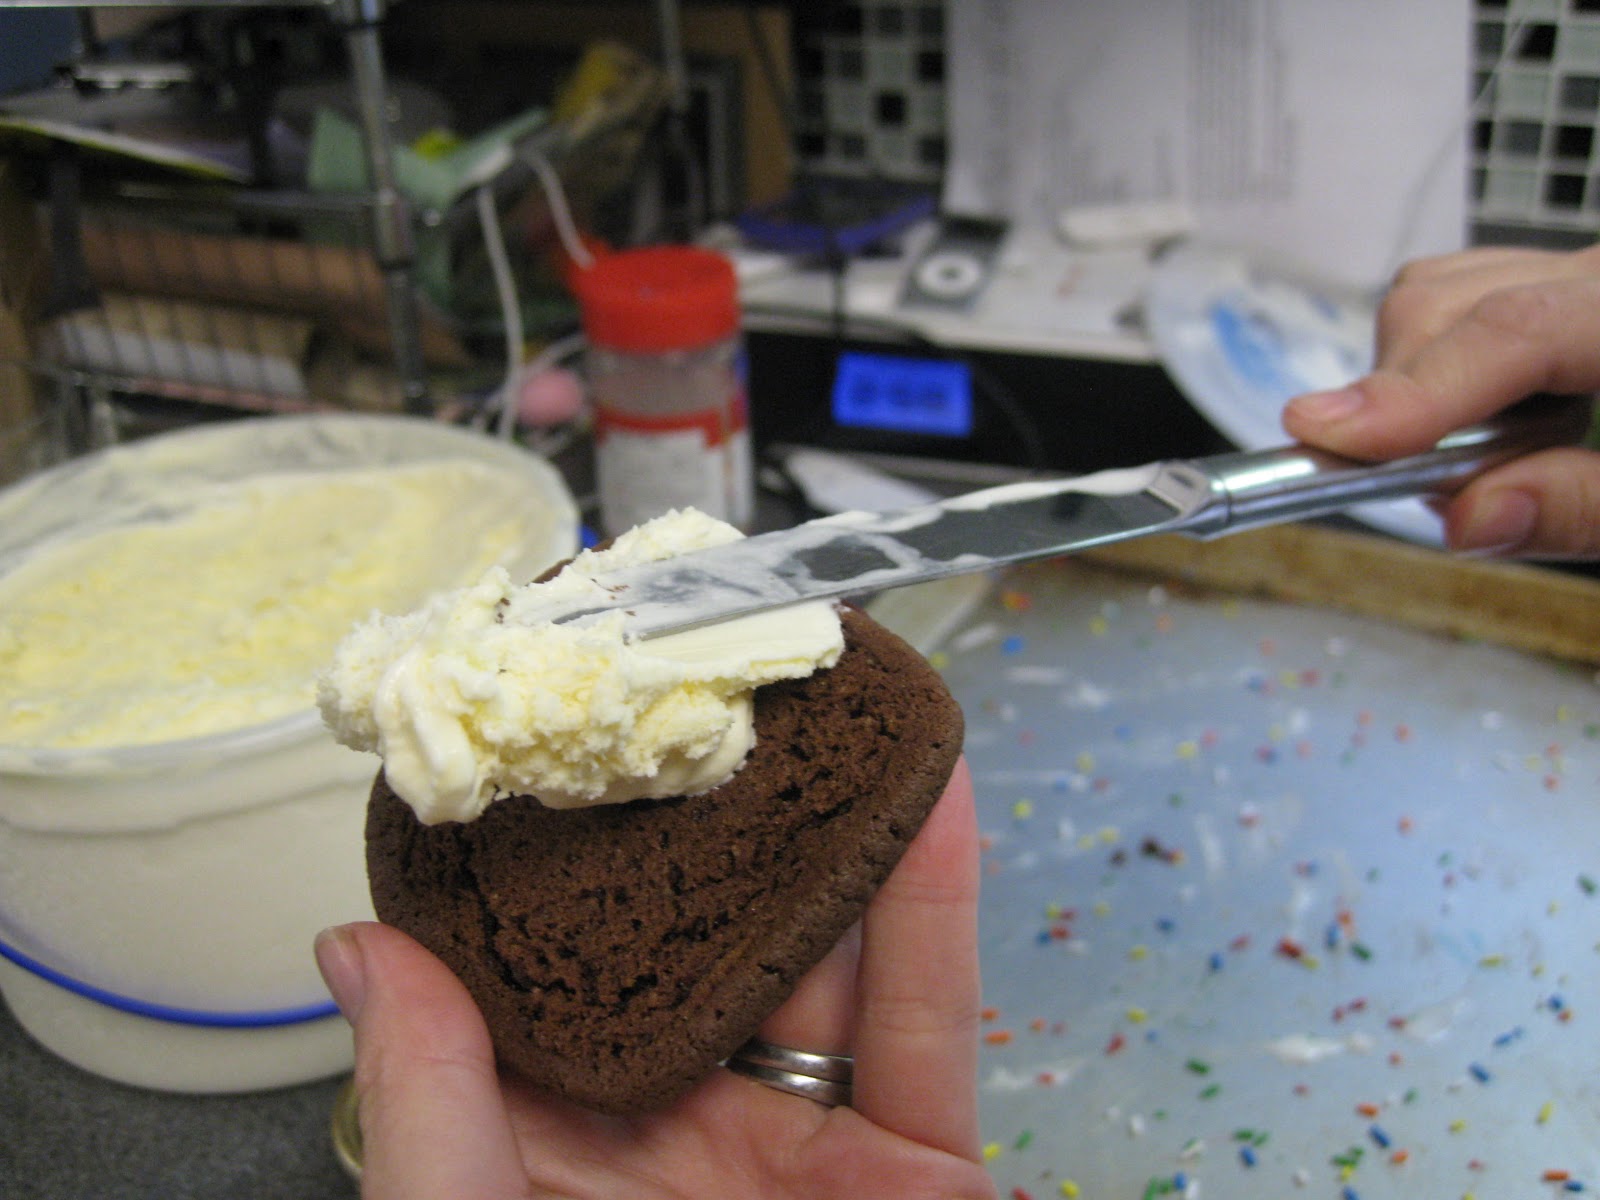
Using a butter knife, spread ice cream in a thick layer on a cookie.  Mine was about 3/4-inch thick. 

Put another cookie on top and press down slightly, then use the knife to smooth out the edges, filling in any missing bits and getting rid of extra ice cream.

At this point my daughter suggested we put sprinkles on the edges, her logic being that, "It will give them more goodness."  Hard to argue with that.

After you're done with one, either put it on the baking sheet in your freezer, or if you're like my daughter, eat it immediately.


After they've been in the freezer for a good while and are nice and firm, you can remove them to a plastic zippered bag and store them there.

Makes about 15 ice cream sandwiches.  Recipe is easily doubled or tripled to make enough for all the neighborhood kids as well as your own.