I love pulled pork. It's so easy, and delicious. Recently though I've been looking for a way to spice it up a bit. And then a great thing happened. I received some purple cabbage and some carrots in our CSA box. (For those of you who don't know, CSA stands for Community Supported Agriculture, and every week I pay some money to get food fresh from a variety of farms. But you just get what is in season, so you don't know what you're getting. It's like a fun surprise every week!) Anyway, those ingredients reminded me of the delicious Vietnamese tacos recipe, and I thought, why not mix them together. So I did. And they were amazing. The spicy-sweet-crunchy slaw adds a nice contrast to the smoky BBQ pork. Try it out!
As a note, pork shoulder usually comes as a huge piece of meat. I usually buy the whole thing and then cut it into 3 or 4 pieces. I freeze whatever I don't use.
Slow Cooker Pulled Pork Sliders with Vietnamese Slaw
Ingredients:
2-3 lb pork shoulder, trimmed of large bits of fat
1 packet dry onion soup mix
1/2 cup water
1/4 cup fish sauce
1/4 cup white vinegar
3 Tbs sugar
2 Tbs fresh lime juice
2 cloves garlic, mined
1 Serrano or Thai chili pepper, seeded and finely chopped
1/2 cup thinly sliced red cabbage
1/2 cup matchstick-sized or coarsely grated carrots
1/4 cup thinly sliced red onion
2 Tbs chopped fresh cilantro
2 Tbs chopped fresh mint
1 cup of your favorite BBQ sauce
Slider or sandwich buns
Place your pork shoulder into the slow cooker and sprinkle with the onion soup mix. Cook on low for 7-8 hours or high for 4-5 hours.
In the meantime, in a medium bowl combine water, fish sauce, white vinegar, sugar, lime juice, garlic, and chili pepper. Mix well, then toss in cabbage, carrots, red onion, cilantro, and mint. Cover and refrigerate for at least 4 hours. The longer it sits the better it will taste!
When the pork is done cooking, shred with two forks, removing and discarding fatty bits as you go. Pour BBQ sauce over pork and stir to fully coat.
To assemble, place some pork on a bun, then top with the cabbage slaw. Serve immediately.
Serves 6.
Showing posts with label Sandwiches. Show all posts
Showing posts with label Sandwiches. Show all posts
Sunday, October 6, 2013

Sunday, October 14, 2012
French Dip

When I was in elementary school, the lunch menu had ten items on it, repeating every two weeks. French dip was one of my favorites, and I always ate every bit. That's why I was pleased when my own children, upon first trying this delightful treat, also loved it. There's something about dipping a sandwich into a hot liquid that just immediately appeals to kids. And even though they don't like swiss cheese on its own, they loved it on the sandwich.
The other great thing about French Dip is that it's easy. Slow cooker cooking at it's best. I bought some hard French rolls at my local grocery store's bakery section, but you could, of course, make your own. This makes enough to feed a crowd, so be prepared for leftovers if you're feeding your family of 4!
French Dip au Jus
Recipe adapted from Our Best Bites
Ingredients:
2 T olive or vegetable oil
1 beef roast, 1 1/2 - 2 1/2 lbs
Salt
Freshly ground black pepper
1 package (1-oz) dry onion soup mix, or 1 medium onion, chopped
1 cup water
1 can (14.5 oz) beef broth
Swiss cheese, sliced (about 1/2 lb)
Crusty buns or rolls, for serving
Heat oil in a large skillet over medium-high heat. While oil is heating, sprinkle salt and pepper over the whole roast. Sear the roast in the hot oil on all sides, just long enough to lightly brown the meat. This seals in the moisture and adds flavor.
Transfer seared meat into the slow cooker. Sprinkle with dry onion soup mix, or onion, and add water (omit if using fresh onion). Add beef broth.
Cook on high for 4-6 hours or low for 8-10 hours. When the meat shreds easily with a fork, shred the entire roast with two forks. Serve on sliced crusty rolls with a slice of swiss cheese. Serve with a side bowl of the juices from the meat, for dipping the sandwiches into.
Serves about 8.
Saturday, August 18, 2012
Breaded Chicken Pita Sandwiches

We spent some time with my sister-in-law and her family this past week, and this was one of the things we ate there. I thought it was so tasty, pretty quick and simple, and everyone liked it. That pretty much makes for a perfect dinner in my opinion.
Breaded Chicken Pita Sandwiches
Recipe by Emily Nuzman
Ingredients:
1 lb chicken, cut into 1/2" cubes
1 cup Italian-seasoned breadcrumbs
1/4 tsp garlic powder
1/4 cup milk
2 T olive or vegetable oil
6 pocket pitas, cut in half
Lettuce
Tomatoes, diced
Cucumbers, diced
Red peppers, diced
Green onions, chopped
Ranch dressing
In a small bowl combine breadcrumbs and garlic powder. Place milk in a separate small bowl. Heat oil a skillet over medium to medium-high heat. Toss chicken pieces into milk, then breadcrumb mixture, then into the hot pan. Cook, stirring occasionally, until chicken is browned and cooked through, about 6-8 minutes. Remove from pan and set aside.
Line half a pita with lettuce leaves, then add chicken and desired vegetables, topping with a drizzle of ranch dressing.
Serves 6.
Friday, June 15, 2012
Ice Cream Sandwiches

My daughter, who is nearly 4 years old, is crazy for ice cream sandwiches. So in honor of the last day of school I thought we'd make some. I played around with the cookie bit until I found something that worked. And the ice cream bit is easy. They turned out great, way better than store-bought! So here's the tutorial. Make a bunch, and enjoy them all summer long!
Ice Cream Sandwiches
Ingredients:
1 Devil's Food Cake mix
3/4 cup vegetable shortening
2 eggs
1/2 tsp vanilla extract
Vanilla ice cream (or whatever flavor you prefer)
Sprinkles (optional)
Preheat oven to 350F. Mix the cake mix, shortening, eggs, and vanilla in a large bowl until well mixed.
Take a leveled tablespoon of the dough and put it on the cookie sheet. Then mold it into a square that is slightly bigger than an inch all around, and about 1/4-1/2-inch thick.


Keep the squares at least an inch and a half apart, because they spread quite a bit. I had twelve raw cookies on my baking sheet.

Place cookies in oven and bake at 350F for 9 minutes. When cookies are baked, remove from oven and immediately use a knife or spatula to make them square again. Unless you don't care, in which case, don't. :)

Let the cookies sit on the baking sheet for a minute or two, then remove to a cooling rack that is lined with paper towels.

Let cookies cool completely, about an hour. When you're ready to put the cookies together, place an empty baking sheet in your freezer and get out the ice cream!
Using a butter knife, spread ice cream in a thick layer on a cookie. Mine was about 3/4-inch thick.
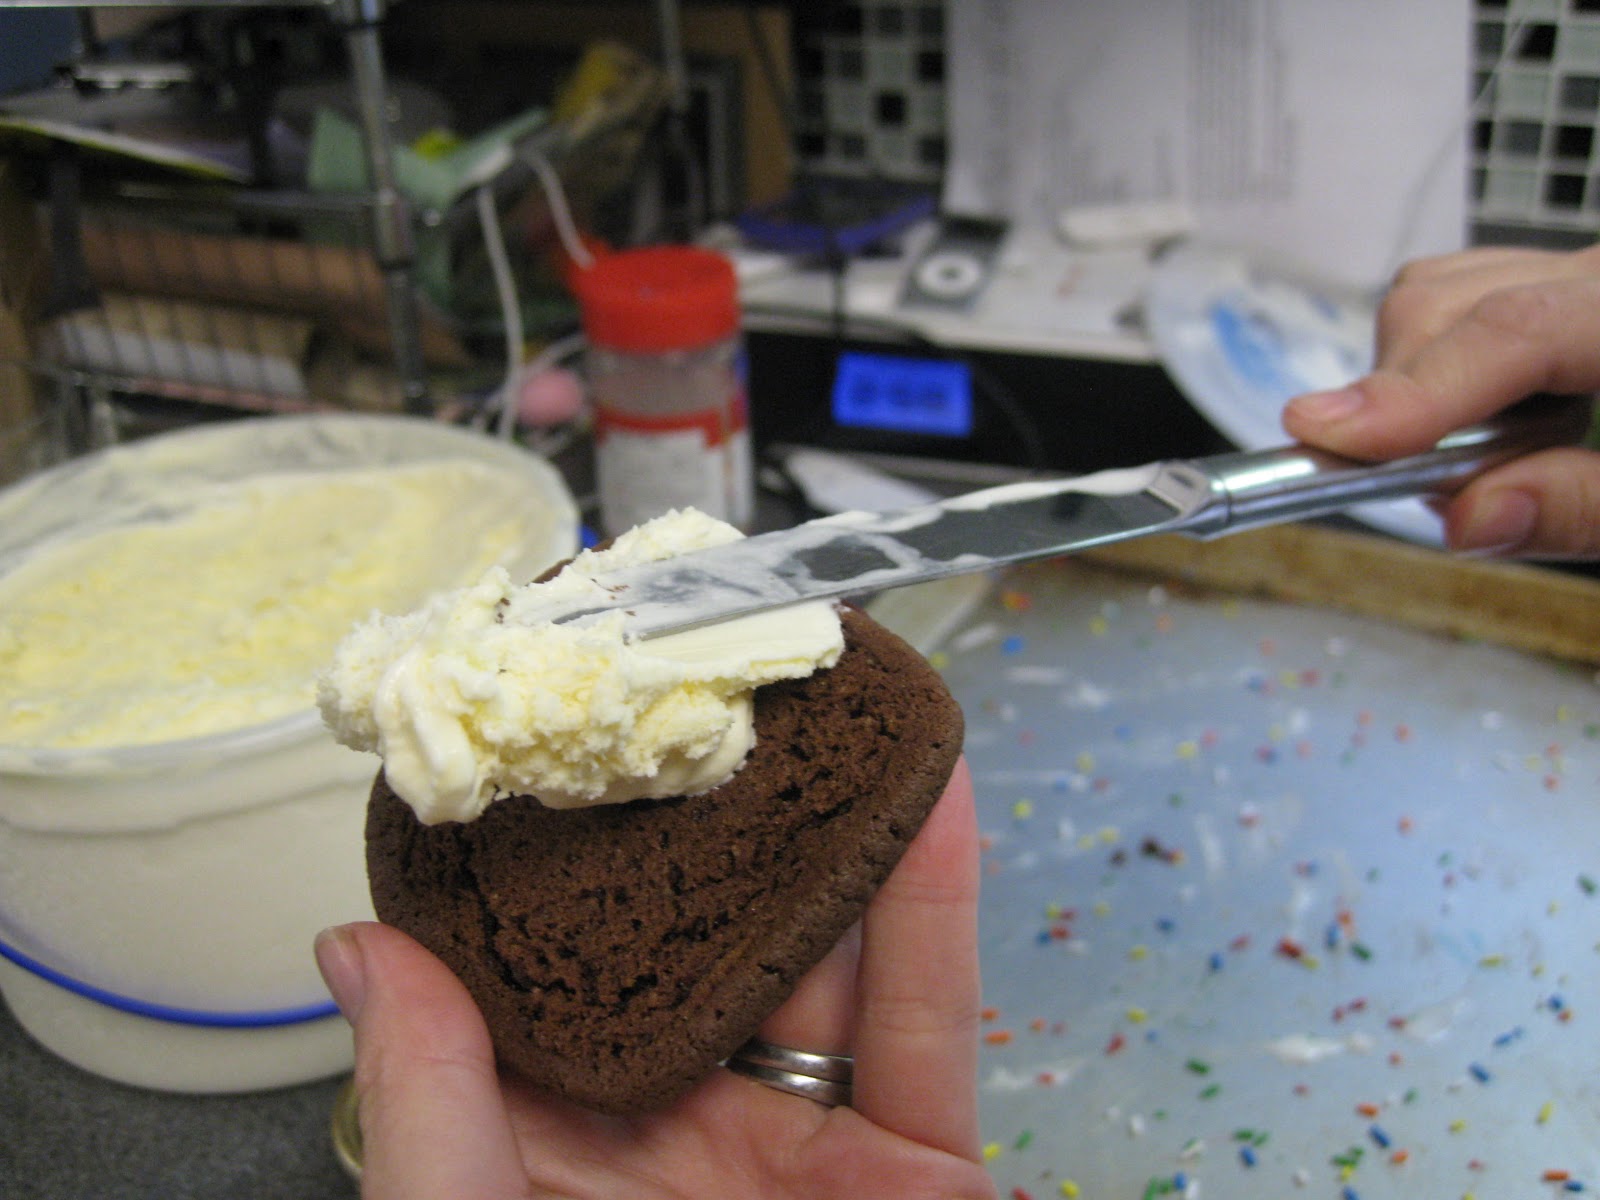
Put another cookie on top and press down slightly, then use the knife to smooth out the edges, filling in any missing bits and getting rid of extra ice cream.

At this point my daughter suggested we put sprinkles on the edges, her logic being that, "It will give them more goodness." Hard to argue with that.

After you're done with one, either put it on the baking sheet in your freezer, or if you're like my daughter, eat it immediately.

After they've been in the freezer for a good while and are nice and firm, you can remove them to a plastic zippered bag and store them there.
Makes about 15 ice cream sandwiches. Recipe is easily doubled or tripled to make enough for all the neighborhood kids as well as your own.
Monday, April 30, 2012
Sausage Pocket Pies
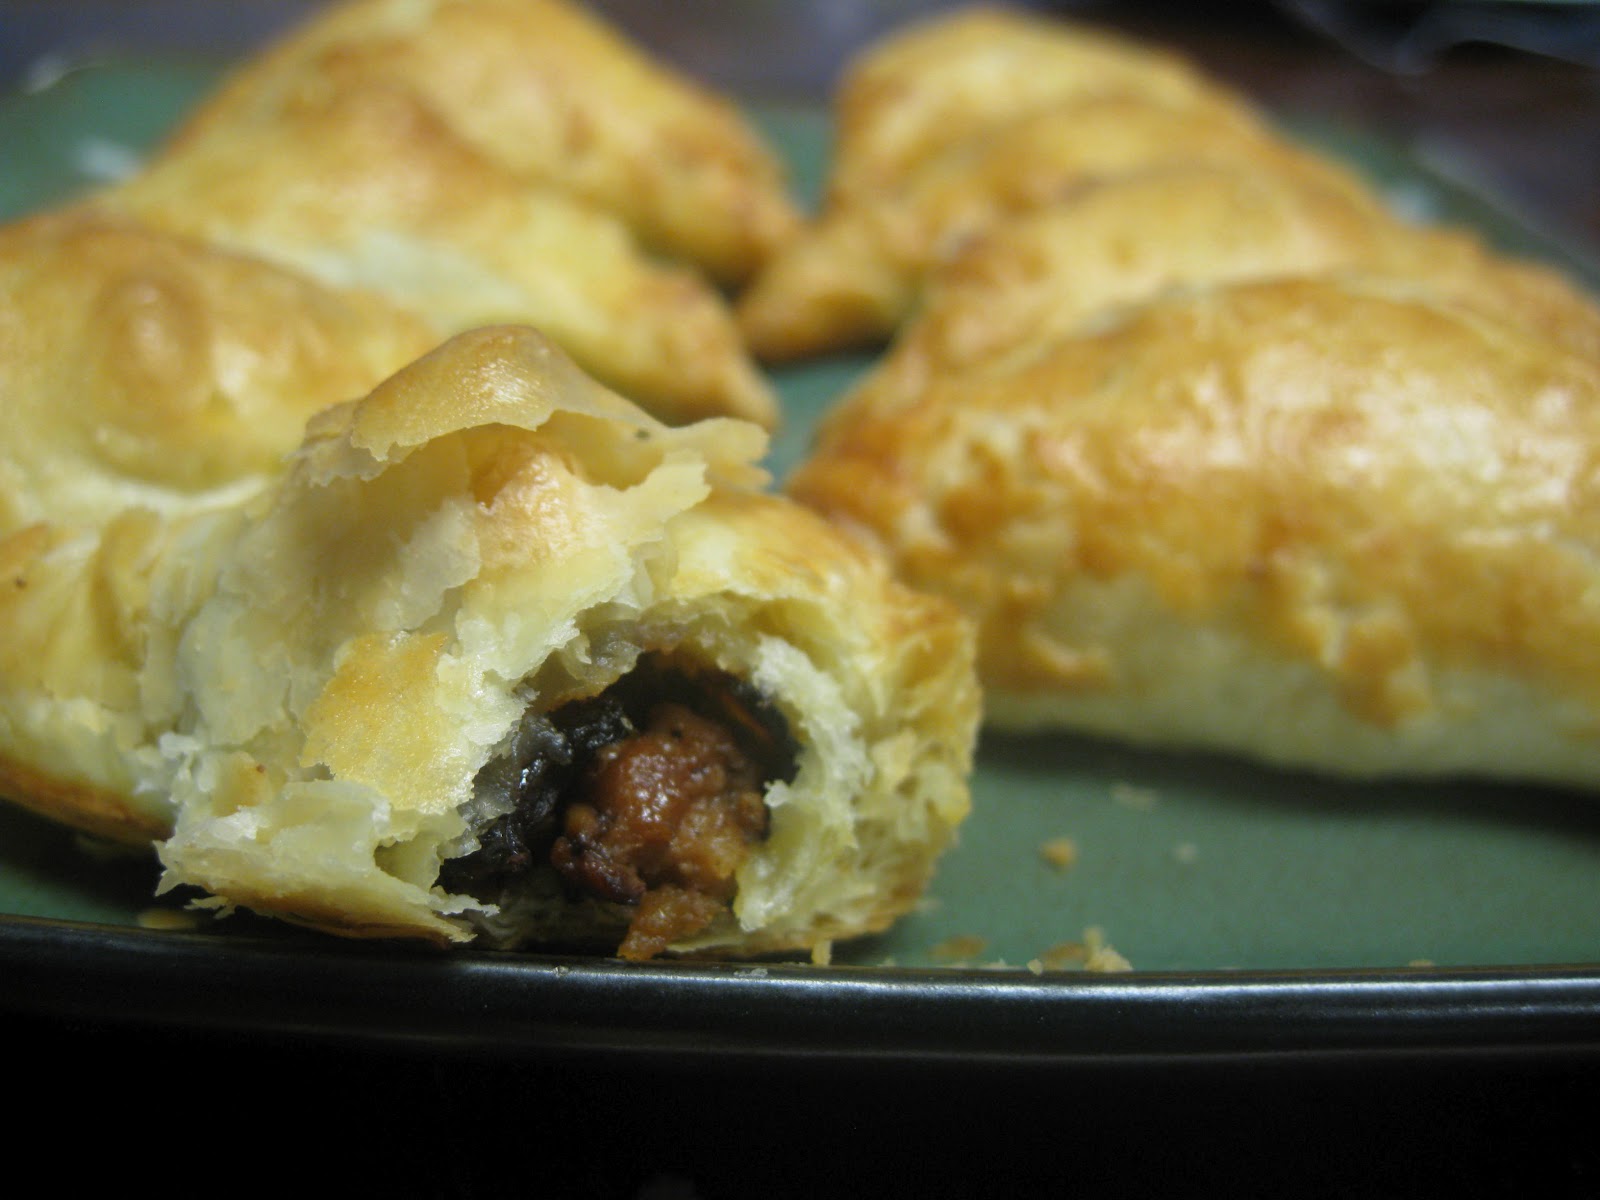
These pies are the perfect travel food--flaky, delicious, meaty, filling, and portable. Grab a bunch to take to a baseball game or on a picnic. Or just eat them for dinner with a lovely green salad. They're delicious! The best part about them, though, is that you can make them ahead of time. You can either refrigerate or freeze them after they're made, and then pop them in the oven when you are ready to eat.
Sausage Pocket Pies
Ingredients:
1/4 pound ground Italian sausage meat
1/2 small onion, chopped
2 cloves garlic, minced (about 1 tsp)
1/4 large Granny Smith apple, peeled, cored and cut into 1/4" cubes (or another very tart apple)
1 stem thyme, leaves picked (or 1/4 tsp dried)
1 small stem rosemary, leaves picked (or 1/4 tsp dried)
1 1/2 tsp chopped fresh parsley (or 1/2 tsp dried)
2 T Craisins or raisins
Salt and pepper, to taste
1 T vegetable oil
1 T butter
1 package Puff Pastry (2 sheets), thawed for 40 minutes
1 egg + 1 tsp water, for egg wash
Prepare two baking sheets with parchment or silpat mats. Have on hand a small bowl filled with water. Preheat oven to 400F.

In a large skillet, cook the sausage over medium-high heat until cooked through. Remove from pan and crumble; set aside. In the same large skillet (don't wash), heat oil and butter over medium high heat. Add onion and saute for two minutes, or until soft and lightly browned. Add garlic and saute until fragrant and lightly brown, about 1 minute. Add apples and saute until slightly tender, about 3-4 minutes. Add thyme, rosemary, parsley, and Craisins, as well as the sausage. Stir all together and cook for about 1 minute to meld flavors. Add salt and pepper to taste. Remove from heat.

Working with one sheet of puff pastry at a time (cover and refrigerate unused sheet until ready to use), cut into nine equal squares (you can cut the sheet first into thirds by cutting along the two fold lines, then cross-cut into nine squares).


Dip one finger in the bowl of water, then rub wet finger along two adjoining edges of a filled square of dough.

Fold the dough corner-to-corner to create a triangle. Using the tines of a fork, press the edges together to seal. Place pocket pie on baking sheet. Repeat with remaining squares and dough.
When all the squares have been filled, you can either bake immediately or refrigerate or freeze the pocket pies. To refrigerate, cover baking sheet tightly with plastic wrap and refrigerate for up to 24 hours. When ready to bake, follow baking instructions below.
To freeze, cover baking sheet tightly with plastic wrap and place entire tray in the freezer. When pocket pies have frozen completely through (at least overnight), remove to a plastic bag to store. When ready to bake, follow the directions below.
In a small bowl, combine the egg and 1 tsp water with a fork or whisk. Brush egg wash over each pie. Bake pies at 400F for 20-25 minutes, or until puffy and browned. Let cool 5 minutes before serving.
Makes 18 pocket pies.

Wednesday, March 7, 2012
Kofta

Kofta is something we had a lot in the middle east. It is, for lack of a better comparison, kind of like an Arabic version of hamburgers. It's traditionally made with spiced lamb meat, but you can substitute ground beef if you can't find lamb. Also, you can press the meat around skewers and grill it into kabobs instead of patties if you'd like. Either way, it's delicious!
Kofta
Ingredients:
1 lb ground lamb (or beef)
1/2 medium onion, grated or finely chopped
3 T chopped fresh parsley
1 tsp ground cumin
1/2 tsp salt
1/4 tsp ground black pepper
4 pitas
Hummus
1/2 a cucumber, diced
1 tomato, diced
 |
| Grilled Kofta patties. You can see the onion and parsley. |
While the lamb is cooking, wrap pitas in damp paper towels and microwave for 1 minute. This will make them soft and pliable.
To serve, slice pita in half to create pocket bread. Place one piece of lamb in each pita half, add a spoonful of hummus, and top with cucumbers and tomatoes.
Serves 4.
Tuesday, February 28, 2012
Roast Beef

I had never made roast beef before. I have cooked roasts in a slow-cooker plenty of times, but this is the kind of roast beef that you slice into thin slices and eat with mashed potatoes, or on a sandwich. It was so good. My kids, who aren't big beef eaters, loved this. They asked for seconds, then thirds, then fourths. They even asked for it again for lunch, which is unheard of. It really is so good. Give it a try. But be aware, you'll need to plan ahead for this one. It's not at all difficult, but it takes some time. But Boy, is it worth it!
Roast Beef
Recipe from America's Test Kitchen
Ingredients:
1 boneless eye-round or top-round roast (2 1/2 - 4 1/2 lbs)
Kosher salt (1 T for 2 1/2 - 3 1/2 lb roast; 4 tsp for 3 1/2 - 4 1/2 lb roast)
2 tsp vegetable oil, plus 1 T oil for cooking
Freshly ground black pepper (1 1/2 tsp for 2 1/2 - 3 1/2 lb roast; 2 tsp for 3 1/2 - 4 1/2 lb roast)
Sprinkle all the sides of roast evenly with salt. Wrap roast in plastic wrap and refrigerate for 18 to 24 hours.
Heat oven to 225F. Pat roast dry with paper towels; rub with 2 tsp oil. Sprinkle all sides evenly with pepper.
Heat remaining tablespoon oil in a skillet over medium-high heat until smoking. Sear roast until browned on all sides, about 2 minutes per side. Transfer roast to a wire rack set in a rimmed baking sheet. Roast in the 225F oven until a thermometer inserted into the center of the roast registers 125-degrees F, about 1 1/4 - 1 3/4 hours.
Turn oven off, but leave roast in oven, without opening door, until temperature of meat reaches at least 130 degrees (medium-rare) or 140 degrees(medium), about 30-50 minutes longer. Transfer roast to carving board and let rest 15 minutes before carving. Slice meat crosswise as thinly as possible and serve.
The leftovers make great sandwiches. Try topping a pile of sliced roast beef with mango chutney for an amazing sandwich!
Serves 6-8.

Wednesday, February 22, 2012
BBQ Chicken Sandwiches
These are so amazingly delicious. We had them at my sister-in-law Natalie's house a few weeks ago and I made them again the next week because I'd been thinking about them non-stop. I really think that it's the combination of toppings that makes it so amazing. You can double this recipe and save some of the leftovers for BBQ Chicken Pizza, which I'll post next.
Slow-Cooker BBQ Chicken Sandwiches
Ingredients:
3 chicken breasts
Your favorite BBQ sauce
1/4 cup honey
1 T mustard
1/2 tsp garlic powder
Sandwich buns
Chopped cilantro
Chopped red onion
Avocado slices
Place chicken in slow-cooker. Pour over enough BBQ sauce to coat chicken. In a small bowl combine honey, mustard, and garlic powder. Pour over chicken. Cook on low for 3-4 hours. Shred chicken 1 hour before serving.
To serve, place shredded chicken on sandwich bun. Top with cilantro, red onion, and avocado slices. Enjoy!
Serves 6.
Slow-Cooker BBQ Chicken Sandwiches
Ingredients:
3 chicken breasts
Your favorite BBQ sauce
1/4 cup honey
1 T mustard
1/2 tsp garlic powder
Sandwich buns
Chopped cilantro
Chopped red onion
Avocado slices
Place chicken in slow-cooker. Pour over enough BBQ sauce to coat chicken. In a small bowl combine honey, mustard, and garlic powder. Pour over chicken. Cook on low for 3-4 hours. Shred chicken 1 hour before serving.
To serve, place shredded chicken on sandwich bun. Top with cilantro, red onion, and avocado slices. Enjoy!
Serves 6.
Greek Steak Pitas with Dill Sauce

This is a great quick dinner. You can make the dill sauce, or use hummus instead. Both are delicious!
Greek Steak Pitas
Ingredients:
1/2 cup fresh lemon juice
1 tsp dried oregano (or even better 1 tsp Herbs de Provence)
1/2 tsp ground black pepper
2 cloves garlic, minced
1 flank steak
4 (6-inch) pitas, cut in half
Romaine lettuce leaves
Crumbled feta cheese
In a zip-top bag, combine lemon juice, oregano, black pepper, and garlic. Add flank steak. Marinate for 10 minutes (set a timer--the meat will begin to taste funny if you leave it too long!). Grill steak over medium-high heat for 3 minutes per side, then turn heat to medium-low and grill an additional 3 minutes per side. Let meat rest for 5 minutes, then slice into thin slices across the grain.
Fill each pita with lettuce and meat, dill sauce or hummus, and top with some feta cheese.
Dill Sauce
Ingredients:
1/2 cup plain yogurt
1/2 tsp dried dill
1/4 tsp salt
1/4 tsp black pepper
1 clove garlic, minced
Mix all ingredients in a medium bowl, and refrigerate until ready to use.
Sunday, January 8, 2012
Panini

I've had a long hiatus from this blog, and at the encouragement of my sister-in-law I've decided to start updating it again. I haven't stopped cooking in the last year, but I did have a baby (which is why I stopped in the first place), and after I hadn't updated in a few months, I forgot about doing it.
But now I'm back, and today I'm bringing you that wonderful sandwich called the panini. A panini is basically a grilled sandwich, but somehow ends up being better than your average grilled sandwich. Because you use crusty artisan bread, and because you grill it in a cast-iron griddle pan, and because it's Italian, it seems so much more.
So I'll give you two recipes I made tonight, and then at the end I'll give you some additional options, because really, you can do with it whatever you want. Make it your own.
Also, I prefer to make my own bread ahead of time, but of course you can buy it. Here's the one I use: Artisan Bread.
Ham-and-Chevre Panini
Ingredients:
4 slices of artisan or french bread (any with a crusty crust and soft interior will work)
2 T herbed chevre (goat cheese)
2 slices ham
1/2 avocado, mashed
1 tomato, sliced
Spread two slices of bread with the chevre. Spread the remaining two slices with the mashed avocado (mashed stays on the bread way better than slices). On top of the avocado, layer a slice of ham and some tomato. Top each sandwich with a chevre-spread slice of bread.
Heat a cast-iron griddle pan (the one with the tall ridges in the pan) or a skillet over medium to medium-high heat. Brush each outer side of the sandwich with a little olive oil, then place in the hot pan. If your pan is big enough you can cook both sandwiches at once.
Get another heavy skillet of roughly the same size, and press down on the sandwiches to flatten them as they cook. Grill for 1-2 minutes, then flip, press, and cook an additional 1-2 minutes. This should just be enough to lightly toast the bread, give it those awesome lines that paninis are famous for, and barely melt the cheese.
Eat immediately.
Serves two.
Dessert Panini
Ingredients:
4 slices of artisan or french bread (any with a crusty crust and soft interior will work)
Nutella
1 Banana
Mini-marshmallows
Spread two of the slices of bread with nutella. Slice the banana and spread slices on the nutella, then top with some mini-marshmallows. Finish by topping each sandwich with the other slices of bread.
Heat a cast-iron griddle pan (the one with the tall ridges in the pan) or a skillet over medium to medium-high heat. Lightly butter each of the outer sides of the sandwiches, then place in the hot pan. If your pan is big enough you can cook both sandwiches at once.
Get another heavy skillet of roughly the same size, and press down on the sandwiches to flatten them as they cook. Grill for 1-2 minutes, then flip, press, and cook an additional 1-2 minutes.
Serves two.
Try these other panini ideas:
Turkey breast, cranberry sauce, arugula
Tomato, basil leaves, fresh mozzarella
Grilled chicken, avocado, bacon
Roasted red peppers, fontina cheeze, carmelized onions
Goat cheese, thinly sliced pears, caramelized pecans, arugula
Ham, cinnamon-sugared cooked apples, sharp cheddar cheese
Nutella, raspberries, whipped cream
Subscribe to:
Posts (Atom)