Tuesday, May 27, 2014

How to Make A Great Birthday Cake


I always make my children's birthday cakes, and every time I have a grown-up taste them they always comment on how good they are.  They taste so much better than straight from a box or purchased from a store.  And they're really easy to make!  I do start with a cake mix, but then add other ingredients to make it taste homemade, and to make the texture and moisture perfect.

You can do it too, to make a birthday cake of any shape or flavor!  Here's how to do it:

Best Birthday Cake

Ingredients:
1 standard boxed cake mix, any flavor, any brand
1/2 package of instant pudding, any flavor (though coordinate with your cake flavor)
1 cup flour
1 cup sugar
1 teaspoon vanilla
1 teaspoon baking powder
1 egg
1/2 cup water
+EVERYTHING LISTED ON THE BOX

Preheat oven to temperature listed on box.  Prepare a baking dish (or several if you're making a layer cake) in the following manner:  Grease the sides well with vegetable shortening.


Place the pan(s) on top of a piece of waxed paper and trace around the bottom with a pencil, then cut out the shape you traced.  Make a large "X" on the inside bottom of the baking pan(s) and then put the waxed paper on top.  Set aside.
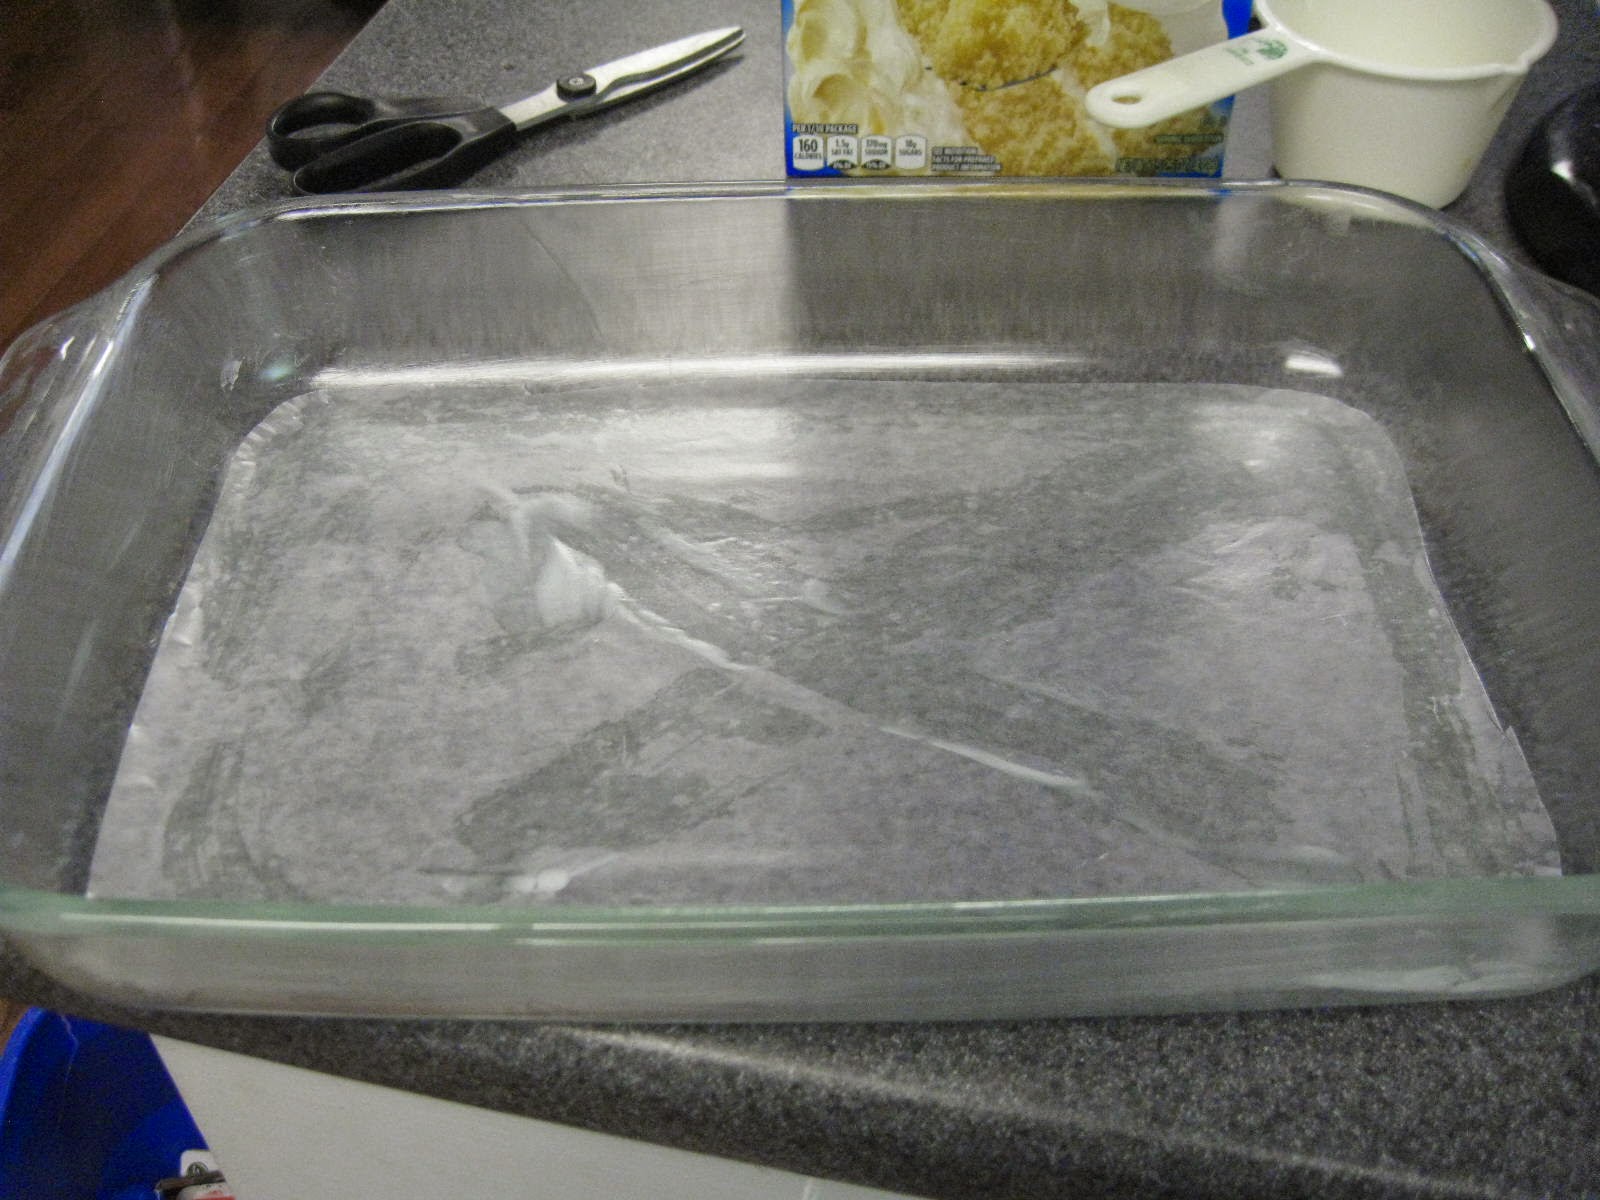
In a large mixing bowl, combine the cake mix, half a package of pudding, flour, sugar, vanilla, baking powder, egg, water, and all the ingredients that the recipe on the cake mix calls for (usually more eggs, water, and oil).  Mix on low speed for 30 seconds, then on high for 2 minutes or until well mixed.  Pour batter carefully into prepared pan(s).  Place in preheated oven to bake.

Baking will probably take 15 minutes more than the suggested time on the box, unless you're making lots of layers.  When a knife inserted into the center of the cake comes out with a few crumbs clinging, it's done baking.

Remove from oven and let cool 10-15 minutes.  Run a butter knife around the edges of the pan, then invert onto a cooling rack.  It should come out easily, without any breakage, because of the waxed paper on the bottom.  You can peel the waxed paper off now or later, whichever you prefer.
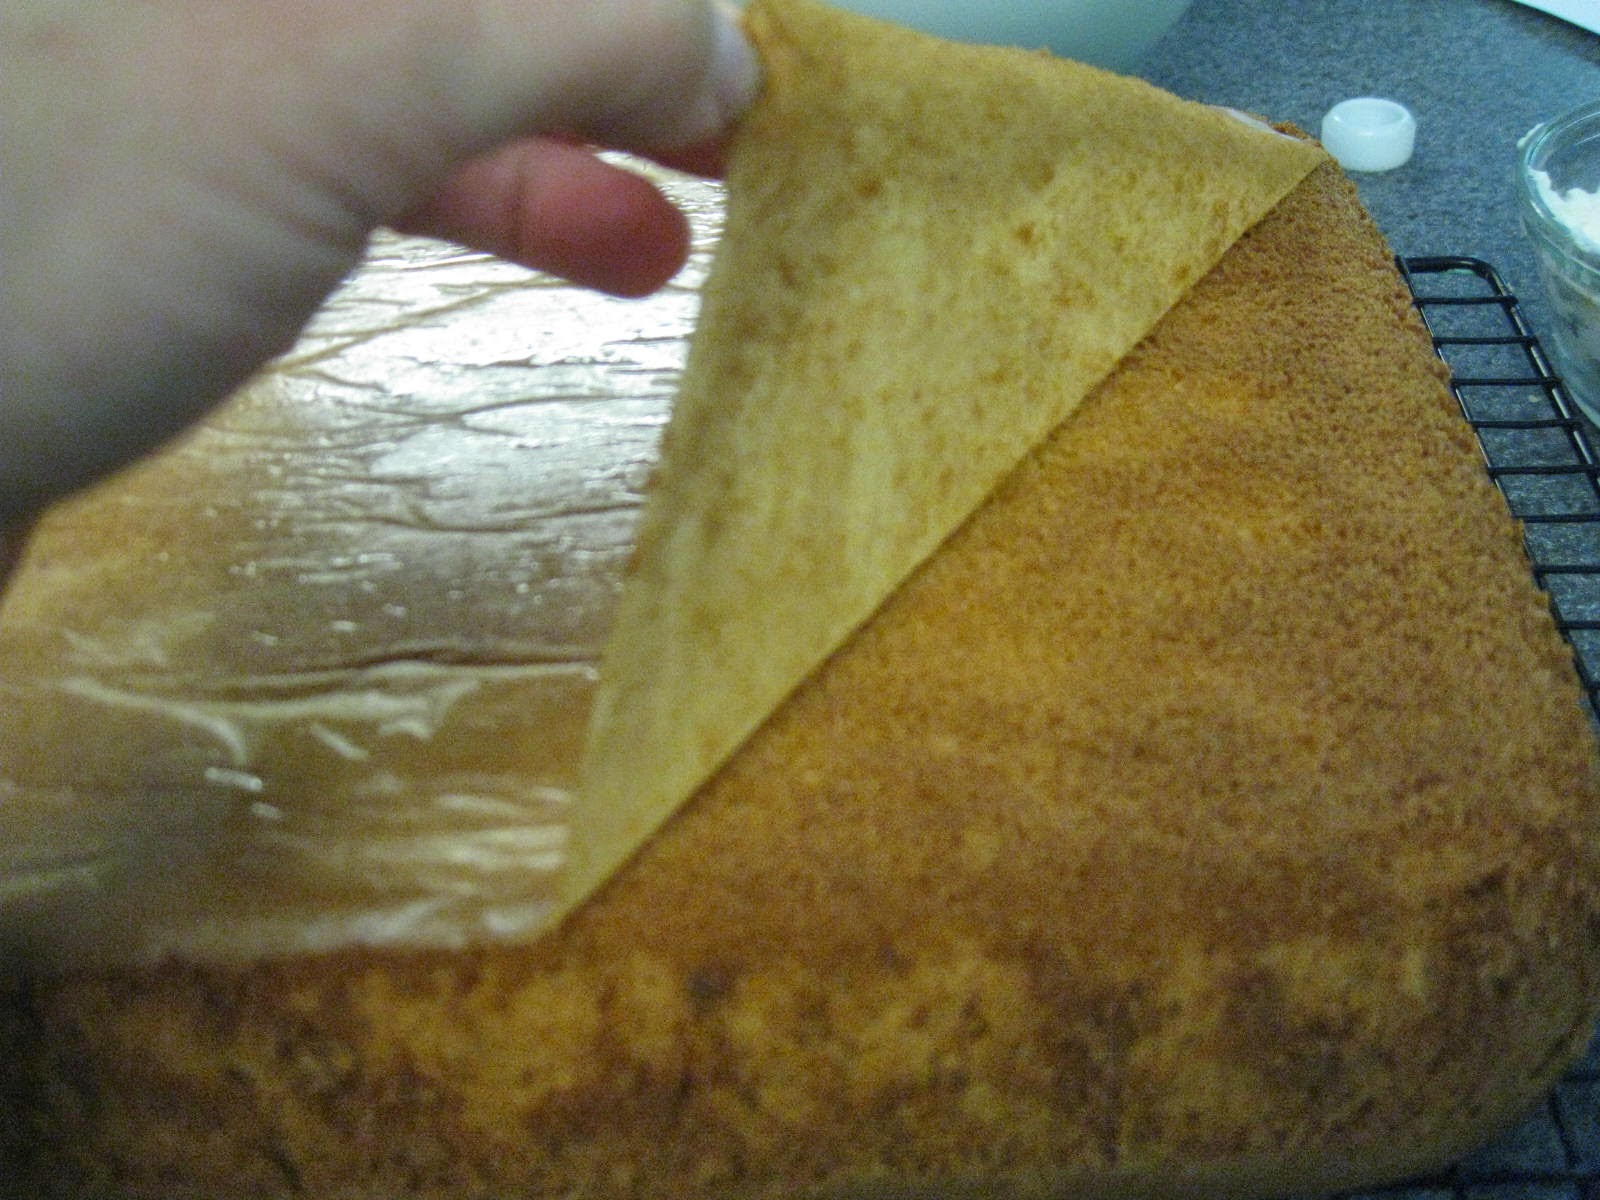
Cool cake completely, or wrap tightly in layers of plastic wrap and freeze, before frosting and decorating.

And if you want your cake to taste REALLY good, use this frosting recipe!

Buttercream Icing
Recipe by Wilton

Ingredients:
1 stick (1/2 cup) butter, room temperature
1 cup vegetable shortening, NOT butter flavored
1/4 teaspoon salt
1/2 teaspoon vanilla (if you want pure white frosting, use clear vanilla)
1/2 teaspoon butter flavoring
1/2 teaspoon almond flavoring (can be omitted if you have nut allergies)
1 lb powdered sugar
1 tablespoon meringue powder (this can be purchased in the baking aisle of most grocery stores, or at craft stores like Michaels)
Water as needed


In the mixer, mix butter, shortening, and salt until well combined, about 2 minutes.  Add butter, vanilla, and almond flavors and mix well.  Add powdered sugar and meringue powder and mix on low until incorporated, about 5 minutes.  Test the consistency and add water, just a teaspoon at a time, until it's the way you want it.  I usually add about 2 tablespoons.  If you add too much water you can add in some more powdered sugar to thicken it up.


You can keep this icing in an airtight container at room temperature for up to 2 weeks.  It makes enough to frost one cake made with the recipe above.


Sunday, October 6, 2013

Cranberry Apple Bread


I've been making cranberry apple bread every year since my first child was born.  It is delicious, but the original recipe really should have been called cranberry apple heart attack in loaf form.  I've been working on making it as delicious without so much of the heart attack, and I think I've succeeded.  So here is the much lighter (but still delicious) version!

Cranberry Apple Bread

Ingredients:
4-5 apples
3 cups flour (you can use 1 cup wheat and 2 white if you'd like)
1 cup sugar
2/3 cup vegetable or canola oil
4 large eggs
1 Tbs vanilla
2 tsp cinnamon
1 tsp salt
2 tsp baking soda
1/2 tsp ground cloves
1/2 tsp baking powder
1 cup fresh cranberries
1 cup chopped walnuts (optional)

First we need to make some unsweetened applesauce.  Peel, core, and slice 2 of the apples.  Place in a small saucepan with about 2 Tbs water.  Cover and cook on medium heat until apples are soft and mash easily with a fork, about 15 minutes.  Remove from heat and mash by hand or in a blender or food processor.  Set aside.

Preheat oven to 325F.  Grease two large loaf pans (8-inch or 9-inch) and set aside.  Peel, core, and slice remaining apples into 1/4-inch-thick slices.  Set aside.

In a large bowl, whisk together flour, sugar, cinnamon, salt, baking soda, cloves, and baking powder.  Add oil, 2/3 cup apple sauce, eggs, and vanilla.  Mix well.  Stir in apples, cranberries, and nuts (if using).  Divide evenly among the two loaf pans.  Bake at 325F for 50-60 minutes, or until a knife inserted into center comes out clean.  Let cool in pan for 10 minutes, then remove from pan and cool on wire rack until cool.

Makes 2 loaves.

Homemade Apple Cider

We went apple picking at a local orchard last week, and my kids were so enthusiastic and had such a great time that we came home with way more apples than I knew what to do with.  I've spent all week using them in various ways, such as apple pie filling, apple sauce, cranberry apple bread, and just sliced and dipped in caramel.  And then on Friday my littlest one asked for some apple cider.  We frequently have apple cider around this time of year but didn't have any at that moment, and so we decided to see how hard it was to make some.  Answer: easy!  It does take a few hours, but was easy and turned out great!  So if you have a bunch of apples that you don't know what to do with, or just love apple cider, this recipe will save the day!

As a note, if you live outside the US you may think this is an alcoholic drink.  In the US, apple cider is a thicker, spiced version of apple juice, similar to Wassail.  It is definitely not alcoholic. 

Homemade Apple Cider
Recipe slightly adapted from food.com

Ingredients:
8-10 medium to large apples
4 cinnamon sticks (or 4 Tbs ground cinnamon)
4 Tbs ground allspice
6 whole cloves
3/4 cup sugar (1 cup if you're using very tart apples like Granny Smith)

Quarter apples (no need to peel or core) and toss into a very large stock pot.  Add water to cover.  Add sugar and stir.  Tie up the spices into a doubled-up cheesecloth or a single-layered thin kitchen towel.  Add the spice sachet to the pot as well. 

Turn the heat to high and bring to a boil.  Boil uncovered for 1 hour, watching and adjusting heat as needed so it doesn't boil over.  After one hour your apples will be soft and slightly mushy, like this:


Put the lid on and continue to simmer for 1-2 hours more, or until the apples begin to break up when you stir them.  Remove from heat.

You can let cool, or if you, like us, were feeling tortured smelling the deliciousness of the cider without being able to drink it for two hours, you can just work with it hot.

Place a large colander over a large bowl.  Remove the spice sachet from the pan.  Using a potato masher, mash the apples in the stock pot.  Once they're mashed, pour the whole thing into the colander.  Use a large spoon to gently push the apple mash to release all the juice.  Once it's mostly drained you can scoop the rest of the mash into another cheesecloth and squeeze it to get the rest of the juice out.  Discard the apple mash (or throw it in your compost heap!).  Pour the cider into a pitcher.  Place a fine-mesh sieve over the same bowl you were just using.  Pour the cider through the sieve to strain out the largish bits of apple mash.  Finally you have your completed apple cider!

You can serve this hot or refrigerate it and drink it cold.  It will keep in the fridge for a week, or you can bottle it or freeze it for later.

Makes about 1 gallon.

Slow Cooker Pulled Pork Sliders with Vietnamese Slaw

I love pulled pork.  It's so easy, and delicious.  Recently though I've been looking for a way to spice it up a bit.  And then a great thing happened.  I received some purple cabbage and some carrots in our CSA box. (For those of you who don't know, CSA stands for Community Supported Agriculture, and every week I pay some money to get food fresh from a variety of farms.  But you just get what is in season, so you don't know what you're getting.  It's like a fun surprise every week!)  Anyway, those ingredients reminded me of the delicious Vietnamese tacos recipe, and I thought, why not mix them together.  So I did.  And they were amazing.  The spicy-sweet-crunchy slaw adds a nice contrast to the smoky BBQ pork.  Try it out!

As a note, pork shoulder usually comes as a huge piece of meat.  I usually buy the whole thing and then cut it into 3 or 4 pieces.  I freeze whatever I don't use.

Slow Cooker Pulled Pork Sliders with Vietnamese Slaw

Ingredients:
2-3 lb pork shoulder, trimmed of large bits of fat
1 packet dry onion soup mix
1/2 cup water
1/4 cup fish sauce
1/4 cup white vinegar
3 Tbs sugar
2 Tbs fresh lime juice
2 cloves garlic, mined
1 Serrano or Thai chili pepper, seeded and finely chopped
1/2 cup thinly sliced red cabbage
1/2 cup matchstick-sized or coarsely grated carrots
1/4 cup thinly sliced red onion
2 Tbs chopped fresh cilantro
2 Tbs chopped fresh mint
1 cup of your favorite BBQ sauce
Slider or sandwich buns

Place your pork shoulder into the slow cooker and sprinkle with the onion soup mix.  Cook on low for 7-8 hours or high for 4-5 hours.

In the meantime, in a medium bowl combine water, fish sauce, white vinegar, sugar, lime juice, garlic, and chili pepper.  Mix well, then toss in cabbage, carrots, red onion, cilantro, and mint.  Cover and refrigerate for at least 4 hours.  The longer it sits the better it will taste!

When the pork is done cooking, shred with two forks, removing and discarding fatty bits as you go.  Pour BBQ sauce over pork and stir to fully coat.

To assemble, place some pork on a bun, then top with the cabbage slaw.  Serve immediately.

Serves 6.

Sunday, August 18, 2013

Baba Ghanoush (or Moutabel)

We lived in the Middle East for three years towards the beginning of our marriage, and we absolutely fell in love with the food there.  I already liked hummus, but I had never heard of what the locals called Moutabel. It is essentially the same thing as hummus, but made of roasted eggplant instead of chickpeas.  The rest of the recipe is nearly identical.  In India they call this Baba Ghanoush, which is what most people probably know it by.  

Because it's made with roasted eggplant, it has a smokey depth that is very different from hummus.  The tahini flavor of hummus is muted a lot in the Baba Ghanoush, and instead it's creamier and richer.  I love love love this, which is why I was so happy to get some eggplants in my CSA delivery this week. I immediately knew what to make!

You can eat Baba Ghanoush the same way you eat hummus, namely with pita, crackers,
veggies, or with grilled meat or veggies.  Tonight we ate it with Arabic-seasoned beef kabobs, grilled mini sweet peppers, grilled grape tomatoes, and grilled onions.  Oh, and some homemade pita, recipe courtesy of this website.

As a note, tahini is also known as tahina or sesame paste.  Every grocery store seems to put it in a different location.  Sometimes it's with the peanut butter and other nut butters, sometimes it's with the foreign food, sometimes it's in the "health food" section.  Ask someone at customer service to look it up for you before you search the whole store.  It will save you time!

Baba Ghanoush

Ingredients:
2 large purple eggplants (not the Japenese variety)
1/4 cup tahini (sesame paste)
1/4 cup freshly squeezed lemon juice
2 cloves garlic, minced (about 1 tsp)
1 1/2 tsp salt
Olive oil for garnish
Sumac for garnish (optional)

First you need to roast the eggplant.  Cut away the green leafy bits around the stem of the eggplants, but leave the stem itself on, as it makes a handy place to hold.  Spray the skin of the eggplants with cooking spray, and then place them under the broiler (on a baking sheet) or on a grill.  If you have adjustable heat settings, keep it on high.  Turn them every 5-10 minutes, and cook until the skins are black and cracking, about 20-25 minutes.  Then set them aside for at least 20 minutes to cool, or until they're cool enough to handle with your bare hands.

Once the eggplant is cool, peel away the skin.  It should come off fairly easily if you've cooked it enough.  Then slice the eggplant all the way around from top to bottom, like you're cutting open an avocado.  Using a spoon, scrape out all the seeds, leaving only the firm pulpy part of the eggplant.  Remove the stem end, and toss whatever you have left (the pulpy part of the eggplant) into a food processor or blender. 

Puree the eggplant until fairly smooth.  Add in the tahini, lemon juice, garlic, and salt and process until well combined.  If it's way too thick to mix you can add a little water.  JUST A LITTLE!  When finished blending, pour the Baba Ghanoush into a serving bowl, swirl a little olive oil on top, sprinkle a bit of sumac over it, and serve!

Will keep for about a week in the refrigerator.  Can be served warm, room temperature, or cool, but I prefer slightly warm. 

Makes about 3 cups.

Friday, August 9, 2013

Quick and Easy Fresh Peach Pie with Whipped Coconut Cream


Several years ago my sister-in-law made this pie for a family gathering.  I've since seen it lots of other places, and it is one of my favorites because it's so quick and easy, and delicious, and showcases the amazing peaches that are in season right now!  So when we went peach picking last week I knew I had to make it!

I decided to spice it up a bit by serving it with whipped coconut cream instead of regular whipped cream.  I think it took it from a great pie to an amazing pie.  It was just the right amount of coconut to transport you to another place.  Yum!

I've included directions on how to make the graham cracker crust, but if you prefer to buy a ready-made one, just skip the first three ingredients and the first part of the instructions.

Quick and Easy Fresh Peach Pie with Whipped Coconut Cream
Recipe adapted from Melinda Davis

Ingredients:
1 sleeve graham crackers (10 full crackers)
2 T sugar
1/2 cup butter (1 stick), melted
6-8 large ripe peaches
1 14-oz can sweetened condensed milk
1 lemon, juiced
1 can coconut milk (full fat, or it won't whip!)
2 Tbs powdered sugar
1 tsp vanilla

For the crust, place all the crackers in a food processor and process until they turn into crumbs.  Pour into a medium bowl and mix with 2 T sugar.  Add melted butter and stir.  Press into bottom and sides of a pie pan, using the back of a soup spoon to smooth to an even thickness.  Place in refrigerator until ready to use.

Skin, pit and slice all the peaches into a medium bowl.  Pour sweetened condensed milk and lemon juice over the peaches and stir gently until well-combined.  Pour peaches and milk sauce into pie crust.  Cover with plastic wrap and refrigerate for 2 hours (or more). 

Place can of coconut milk into freezer at least 30 minutes before serving pie.  Just before serving, remove can from freezer.  TURN CAN UPSIDE DOWN and open from bottom.  This is because the fat, which is what you want to whip, rises to the top.  You need to get rid of the coconut water that is at the bottom, so open the can upside down and pour out the coconut milk.  You can keep it for another use or discard it, as you desire.

Once the coconut water is removed, scoop out the coconut cream into a medium bowl.  Add powdered sugar and vanilla and beat until light and fluffy, about 5 minutes on high.  Unlike regular whipped cream, coconut cream stores well in the refrigerator and won't separate.

Serve a slice of cold pie with the coconut cream on top.  Enjoy!

Makes 1 pie, about 6-8 slices.


Tuesday, August 6, 2013

Zucchini Lasagne


It's that time of year again -- Zucchini Time!  They are plentiful at the moment, and I'm loving it!  Unfortunately, I'm the only member of my family that loves the zukes, which means I end up having to "hide" them in foods quite often.  I love making Zucchini Bread, as well as Slow-Cooker Thai Chicken, which uses zucchini as well.  But I wanted something new. 

I was talking with my friend Amy and she mentioned that she had made lasagne, substituting zucchini for the noodles.  Her only complaint was that you didn't taste enough of the zucchini.  Perfect! I thought.  My family will love it!  Of course, if you are a big lover of zucchini you can double it, and just put thicker layers of the zucchini between the layers of cheese and meat.

I served this with some amazing cheesy garlic bread that I found on this site.

As a side note, this makes one 8"x8" square pan, enough for 6 servings.  If you want a 9"x13" pan, you can double the recipe.

Zucchini Lasagne
Recipe adapted from Natalie Beal

Ingredients:
1 T olive oil
1/2 lb Italian sausage
1 tsp minced garlic
1 T fresh basil leaves, chopped
1/2 tsp salt
1 15-oz can diced tomatoes (or 2 fresh tomatoes, chopped)
1 6-oz can tomato paste
1 large zucchini, very thinly sliced into circles or half-circles (use a Mandolin or food processor if you have one!)
1 1/2 cups cottage cheese
1 egg
1/2 cup Parmesan cheese, grated
1 tsp fresh parsley, chopped
1/4 tsp pepper
1/2 lb shredded mozzarella cheese

Preheat oven to 375F.
In a medium skillet, heat oil over medium-high heat.  Add Italian sausage and cook, stirring occasionally, until browned.  Add garlic, basil, salt, tomatoes, and tomato paste and stir to combine.  Cook 5-10 minutes on a low simmer.  Set aside.
Meanwhile, in a medium bowl, combine cottage cheese, egg, Parmesan cheese, parsley, pepper and all but 1/4 cup of mozzarella cheese.  Set aside the last 1/4 cup of mozzarella to put on top of the lasagne before baking.
Spoon a very small amount of the meat sauce into the bottom of an 8"x8" square pan and spread to thinly cover the bottom.  Layer half the zucchini, with edges of circles slightly overlapping, in rows until the bottom of the pan is covered.  Next spread half the cheese mixture on top of the zucchini, followed by half the meat mixture.  Next layer the remaining zucchini slices, followed by the remainder of the cheese and then the meat sauce.  Top with the 1/4 cup reserved mozzarella cheese.
Bake in the preheated 375F oven for 30 minutes.  Let sit for 10-15 minutes before serving.
Serves 6.